CardFlow Admin Panel Documentation
Thanks for choosing the CardFlow Digital Wallet. This guide walks through installation steps, manual setup, demo users, and all major admin configuration panels.
System requirements
Before you run the installer, ensure the target server meets the minimum requirements:
- PHP 8.2+ with extensions: OpenSSL, PDO, Mbstring, Tokenizer, JSON, cURL, Fileinfo, BCMath.
- Database: MySQL 8, MariaDB 10.5+, PostgreSQL 12+, or SQL Server 2019+.
- Queue backend (database driver supported by default; Redis or others optional).
cPanel: create database & upload files
Database & user
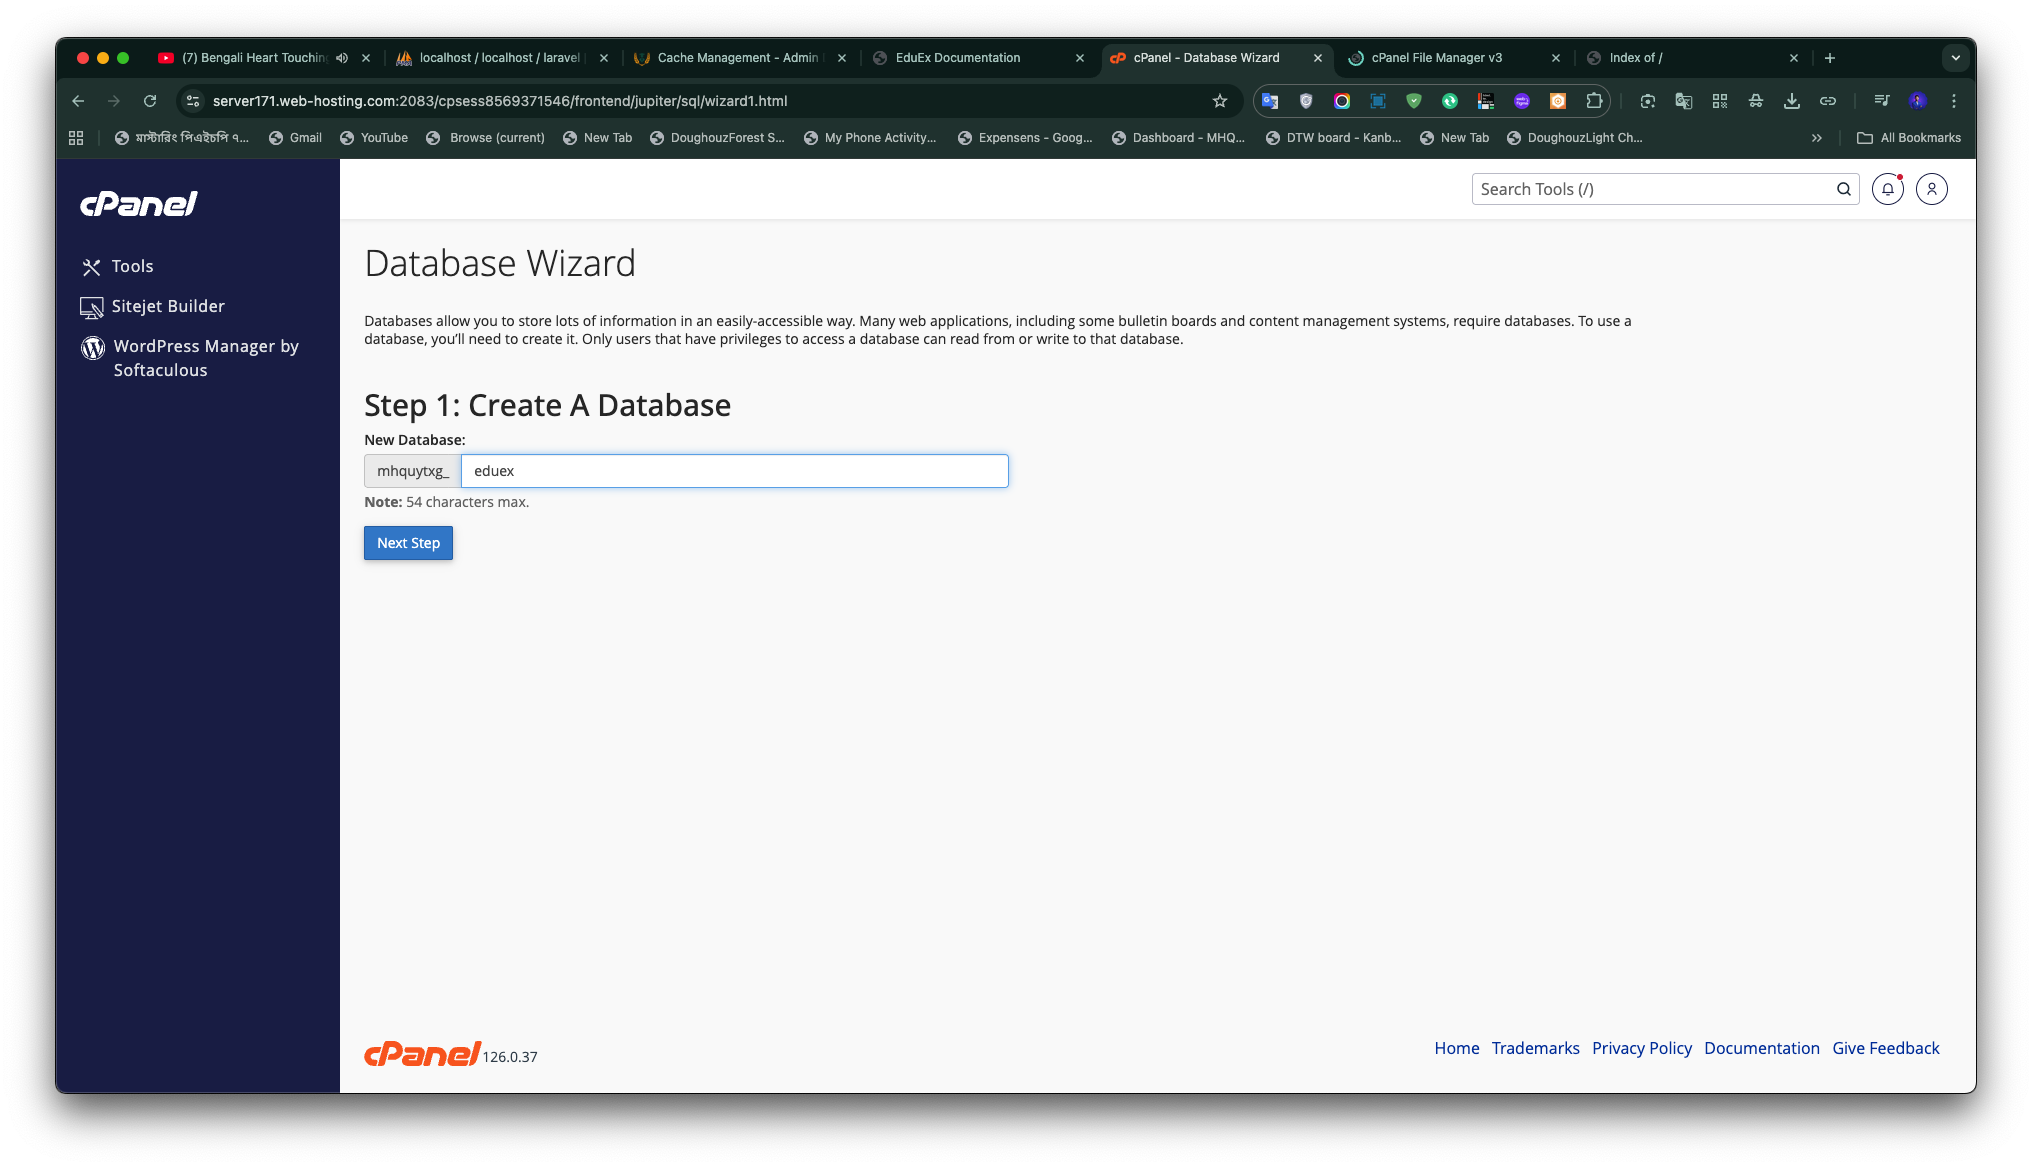
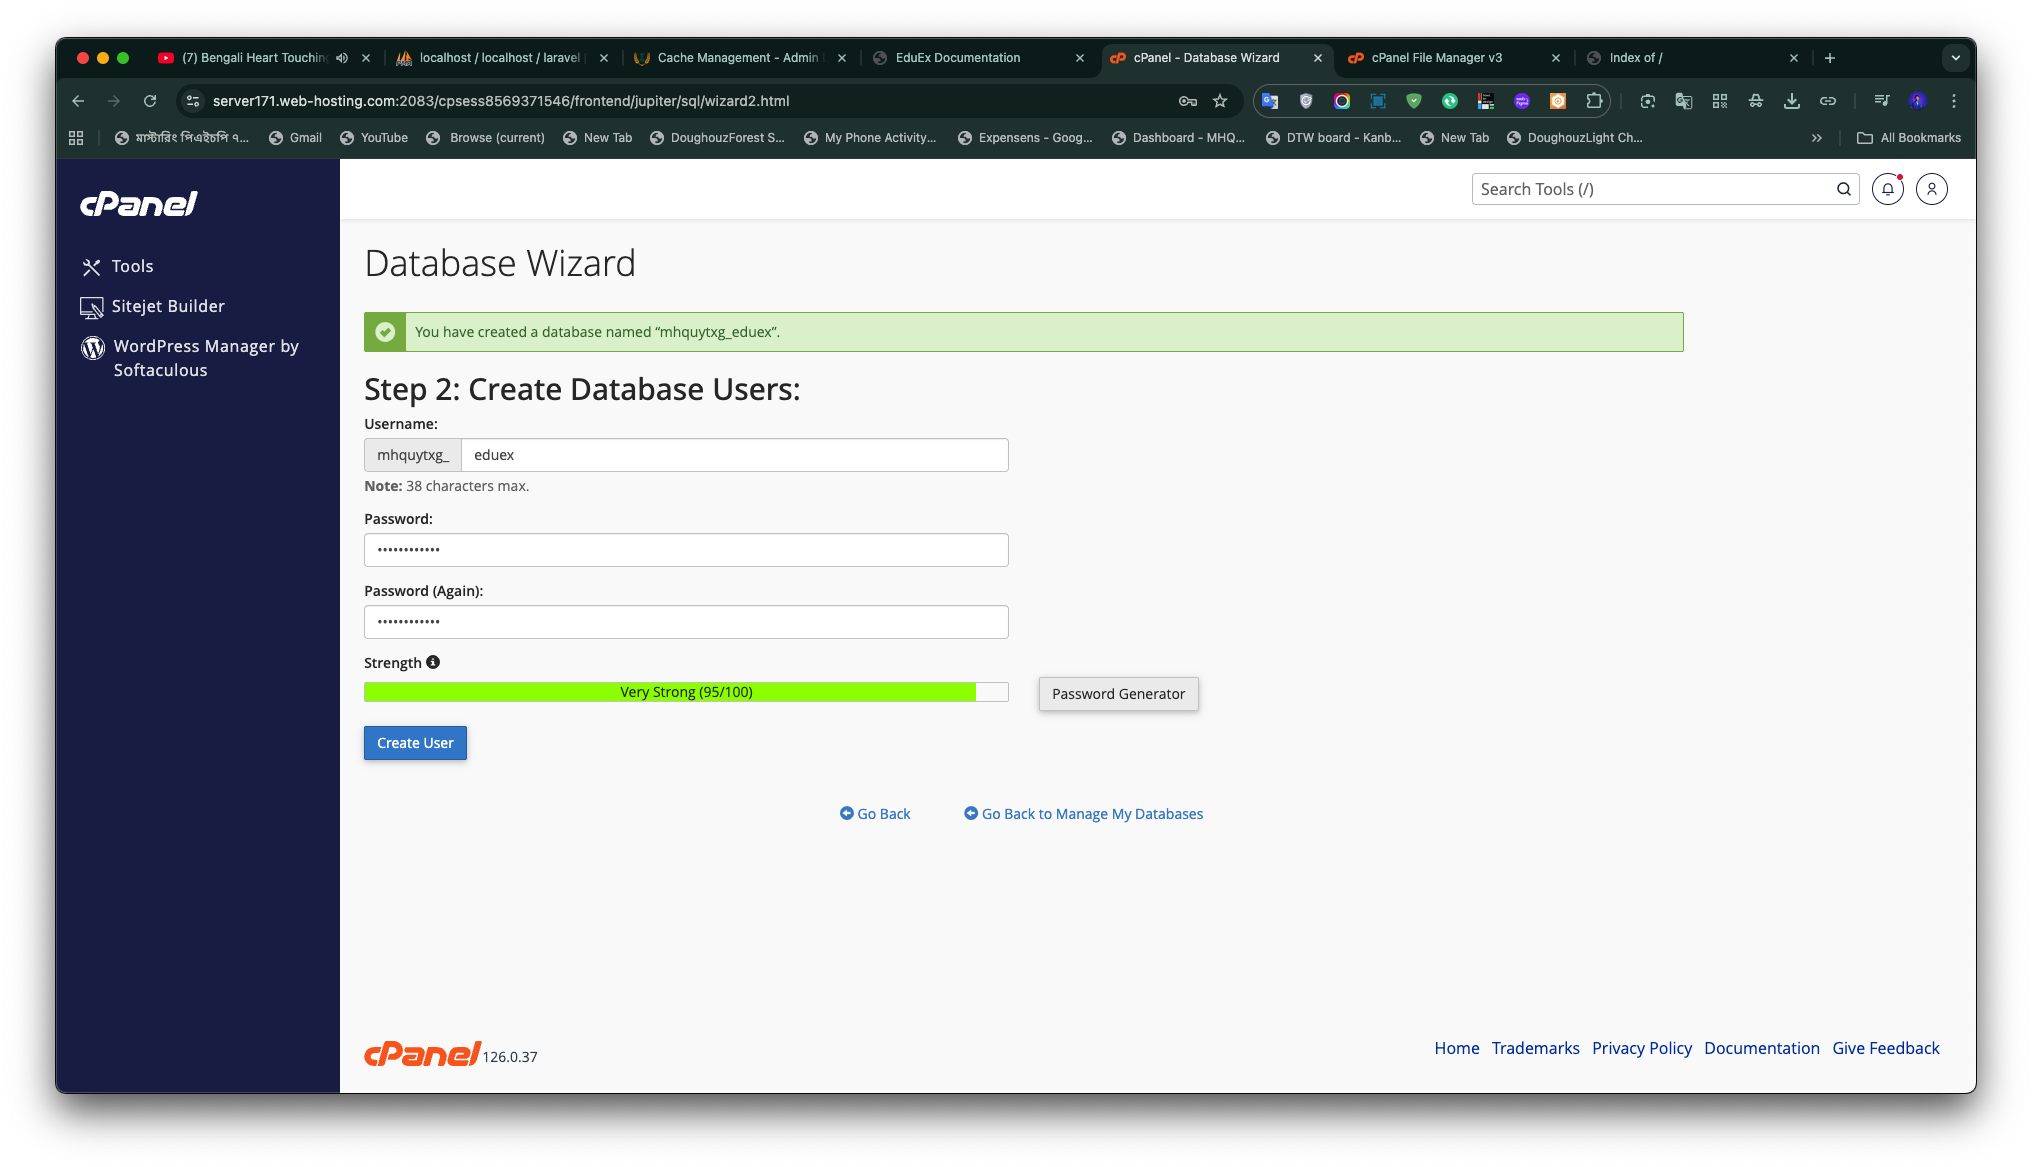
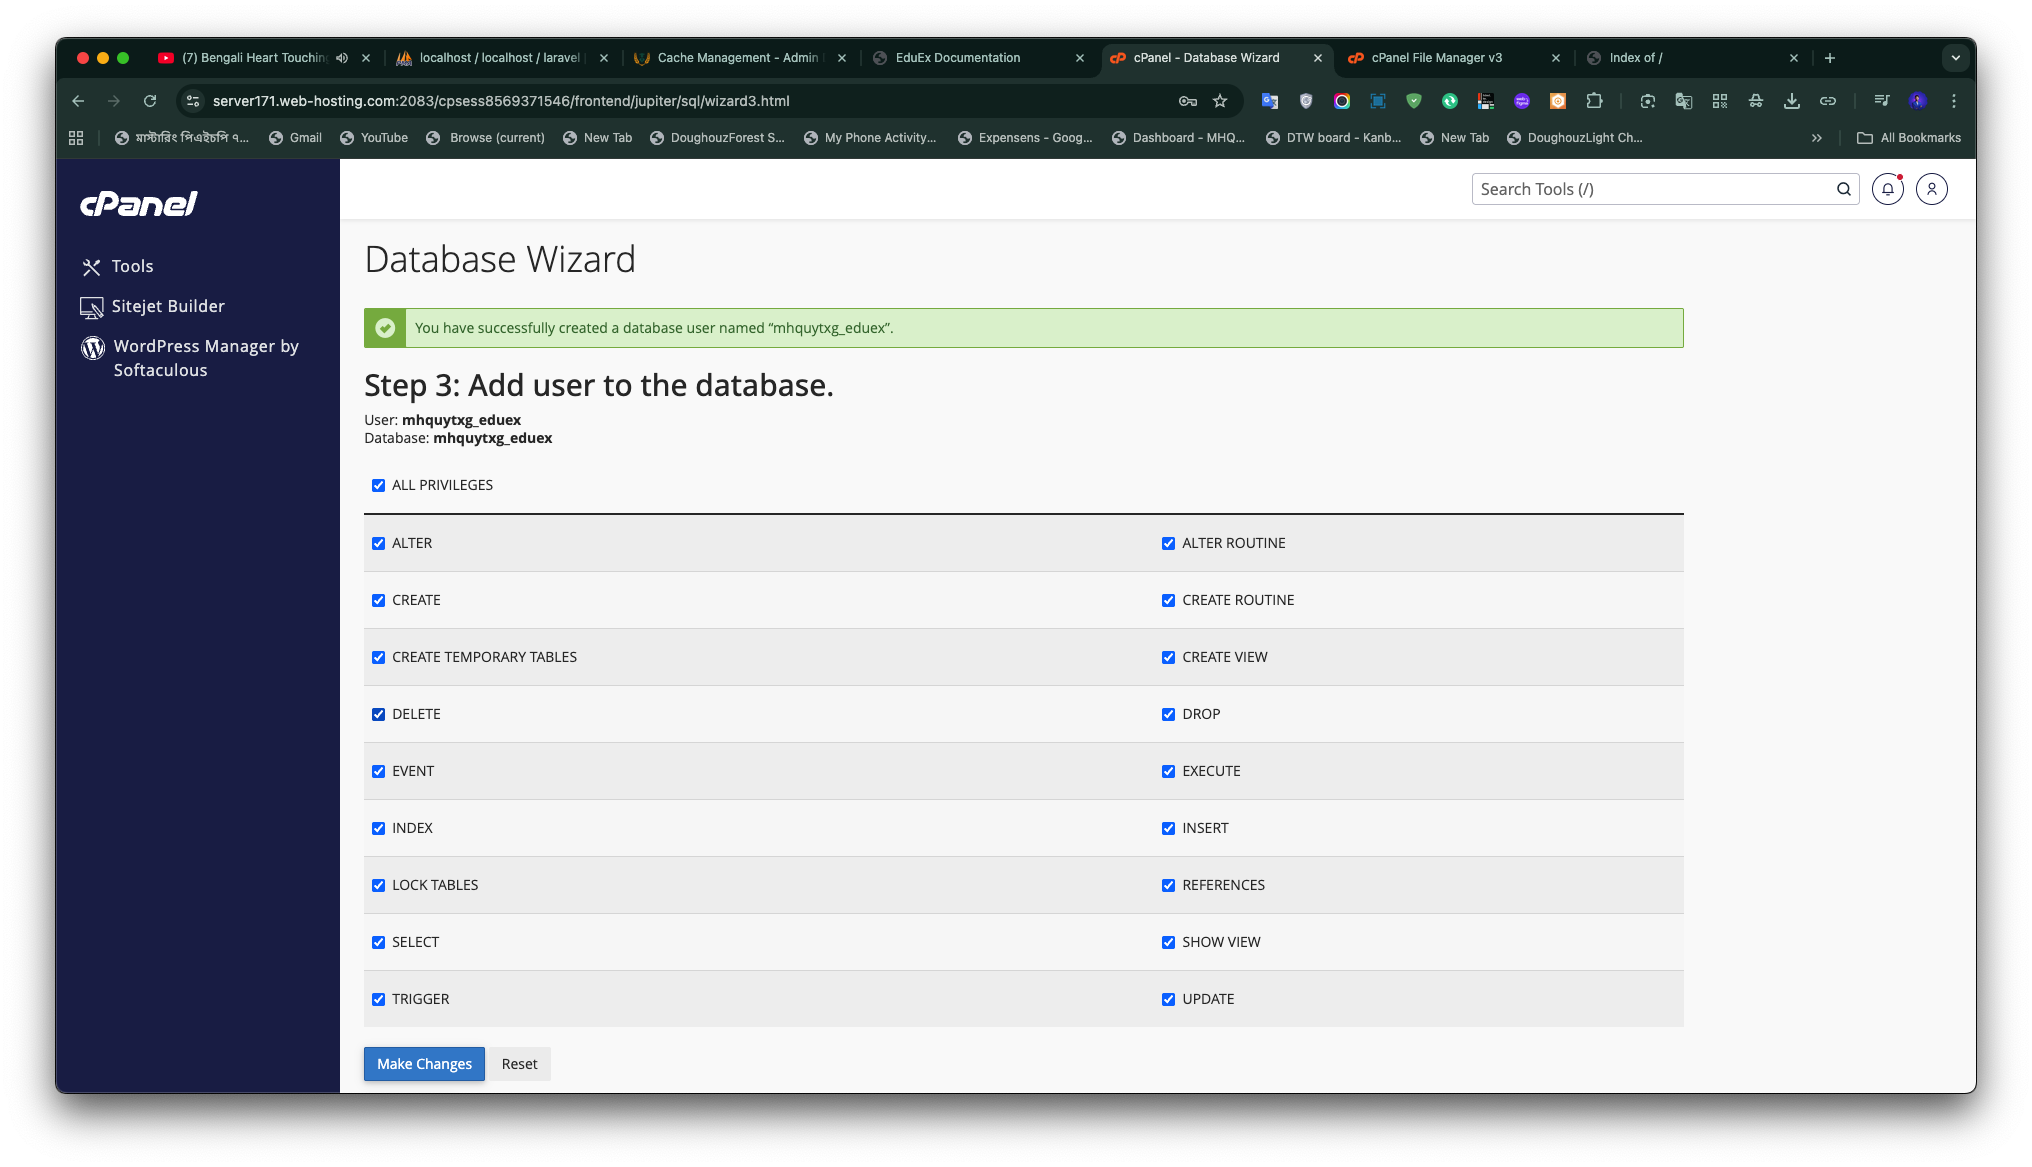
- Open MySQL® Databases in cPanel and create a database (for example
CardFlow_db). - Create a database user with a strong password, then add the user to the database granting ALL PRIVILEGES.
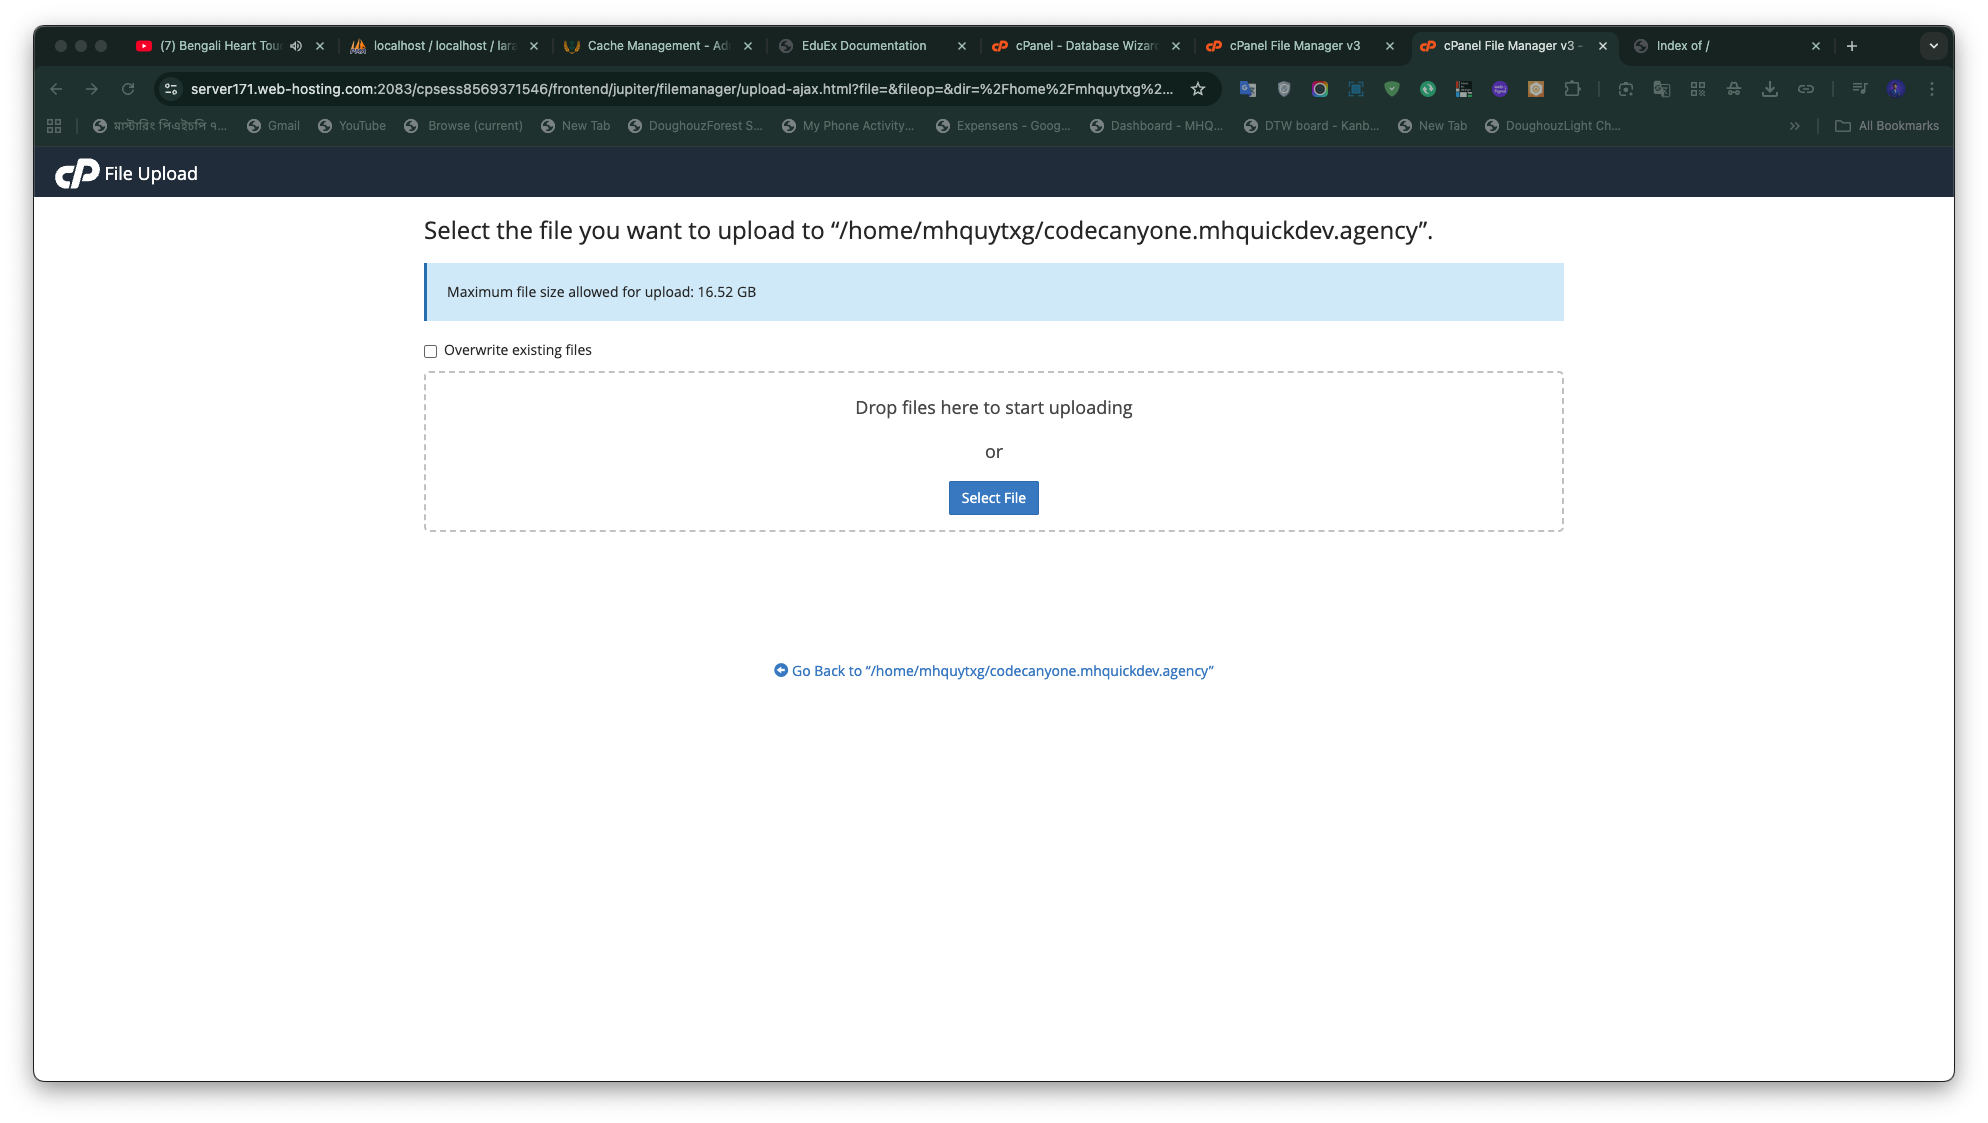
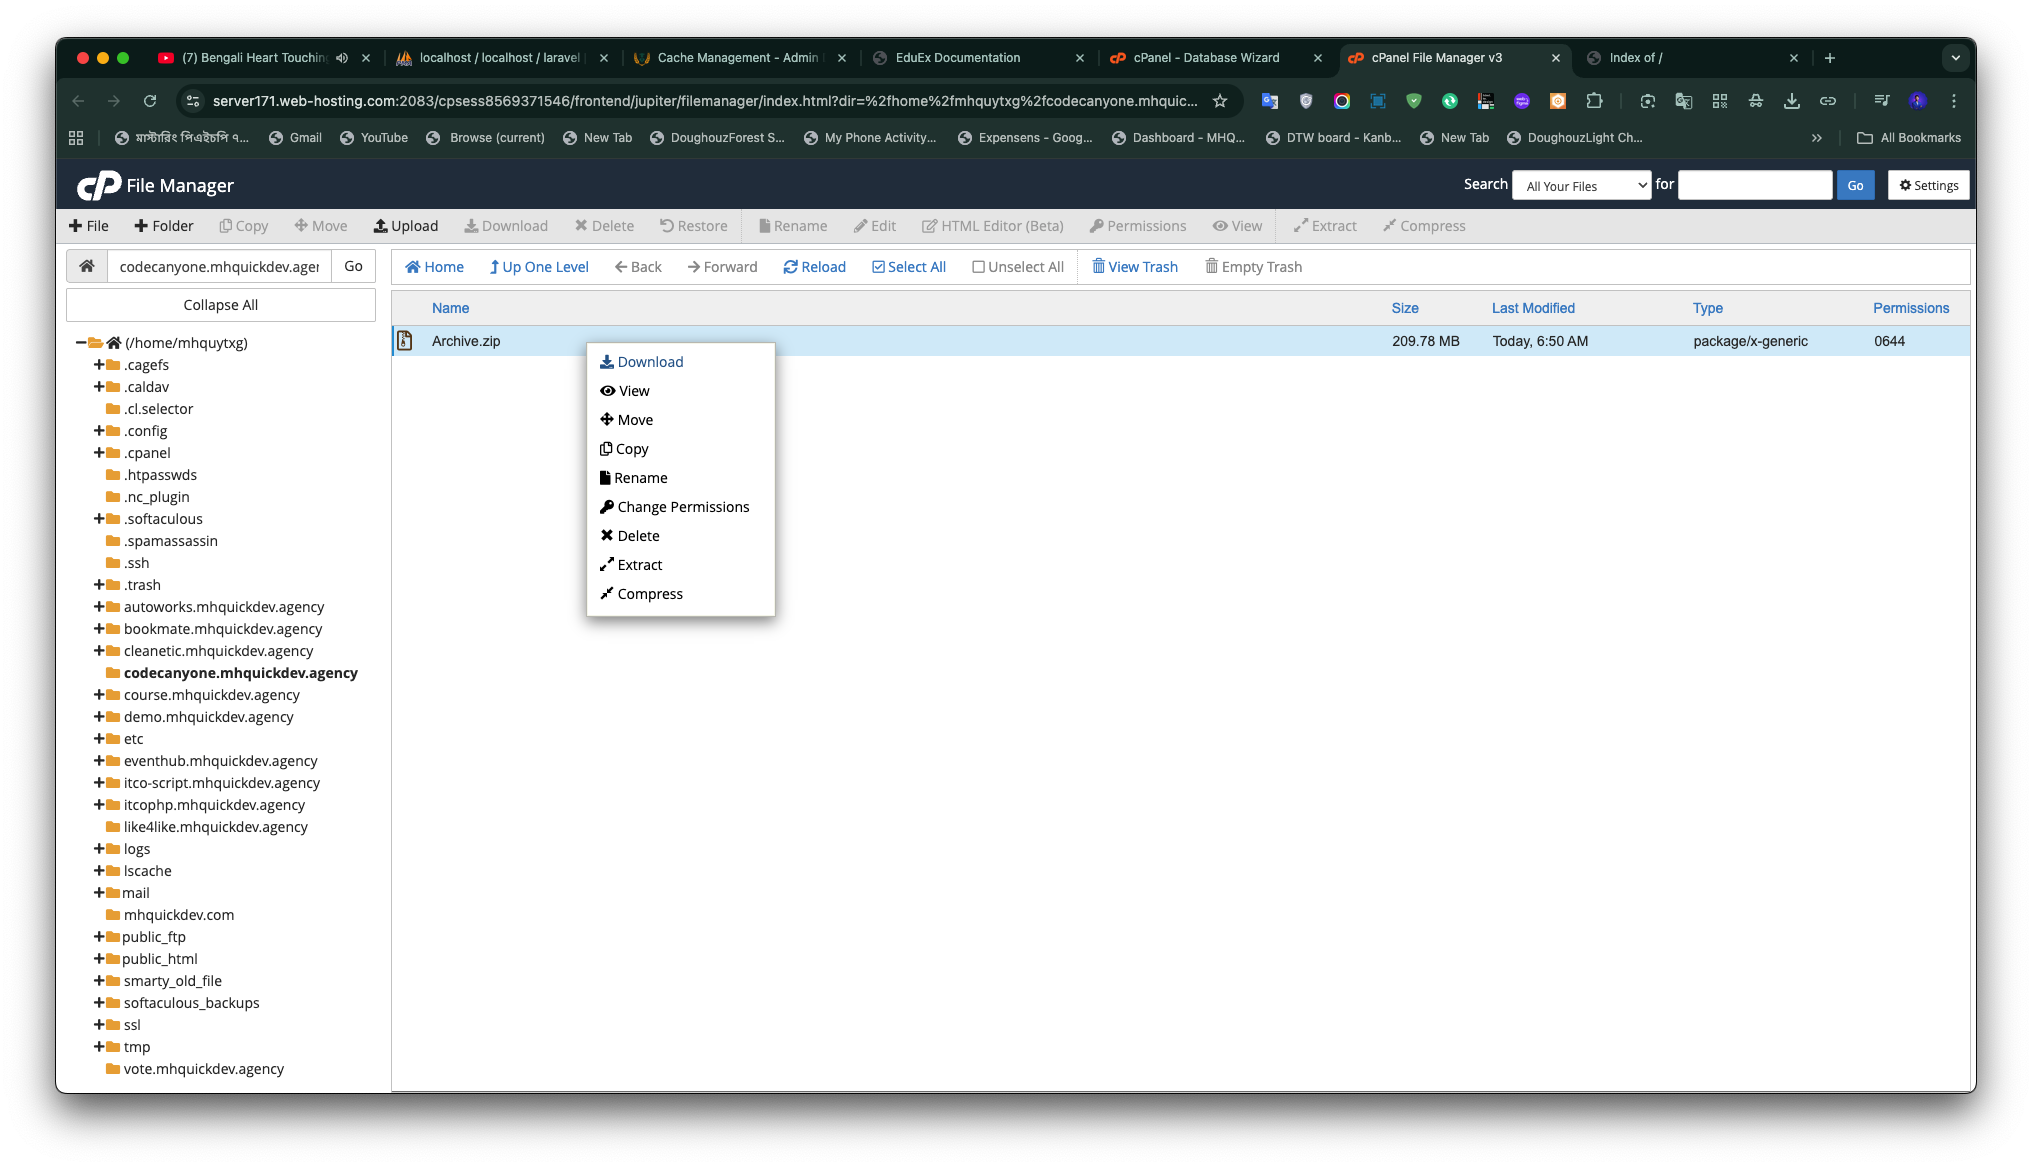
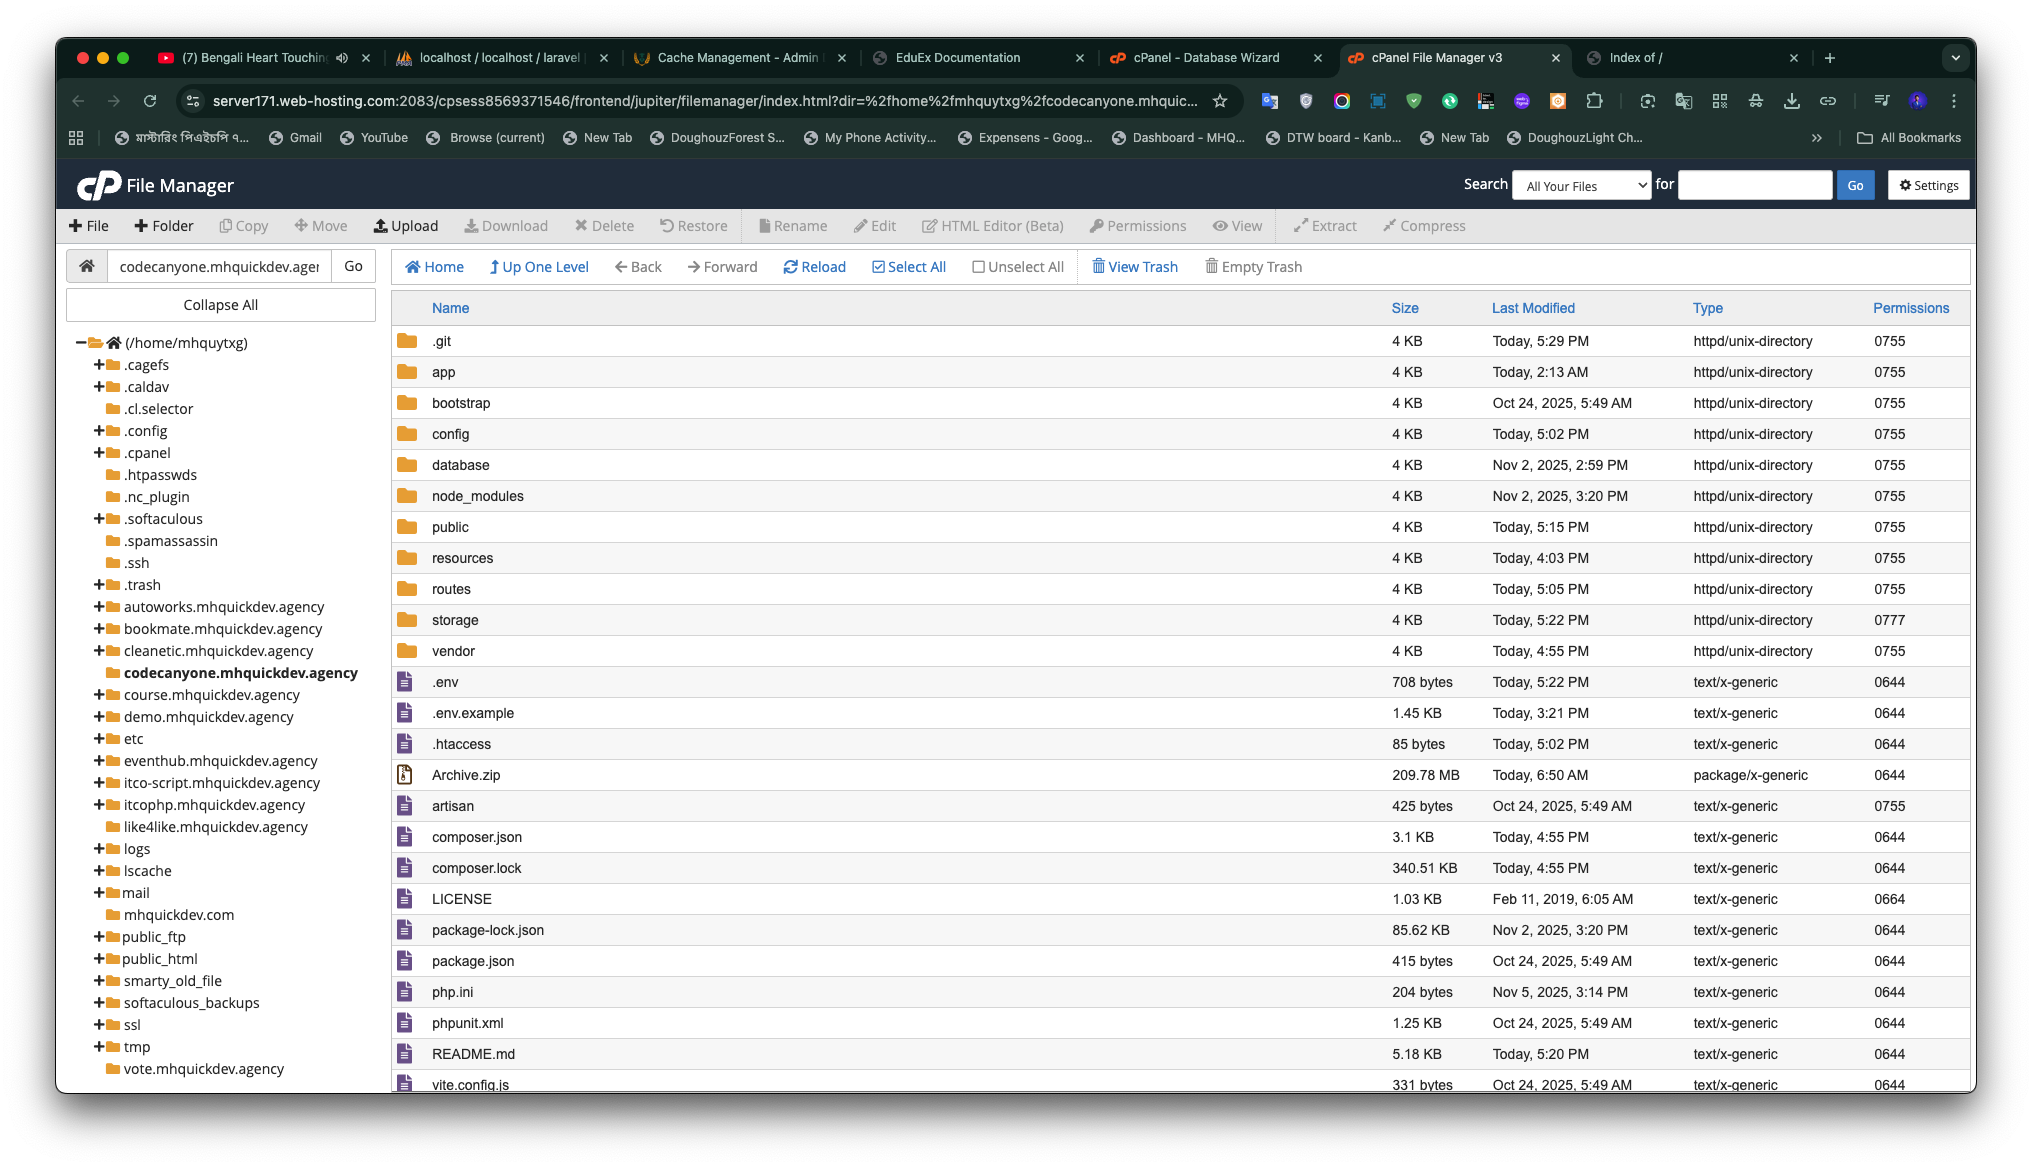
Upload application files
- Upload CardFlow Zip file.
- In File Manager go to
public_html/(or the target directory) and upload the archive, then extract it.
INFO
Without terminal access, you can complete migrations by visiting /install after uploading.
Setup wizard
CardFlow bundles a polished setup wizard for first-time installs. Browse to /install after configuring your vhost or running php artisan serve.
1. Welcome
Quick intro, high-level checklist, and a reminder about server requirements. 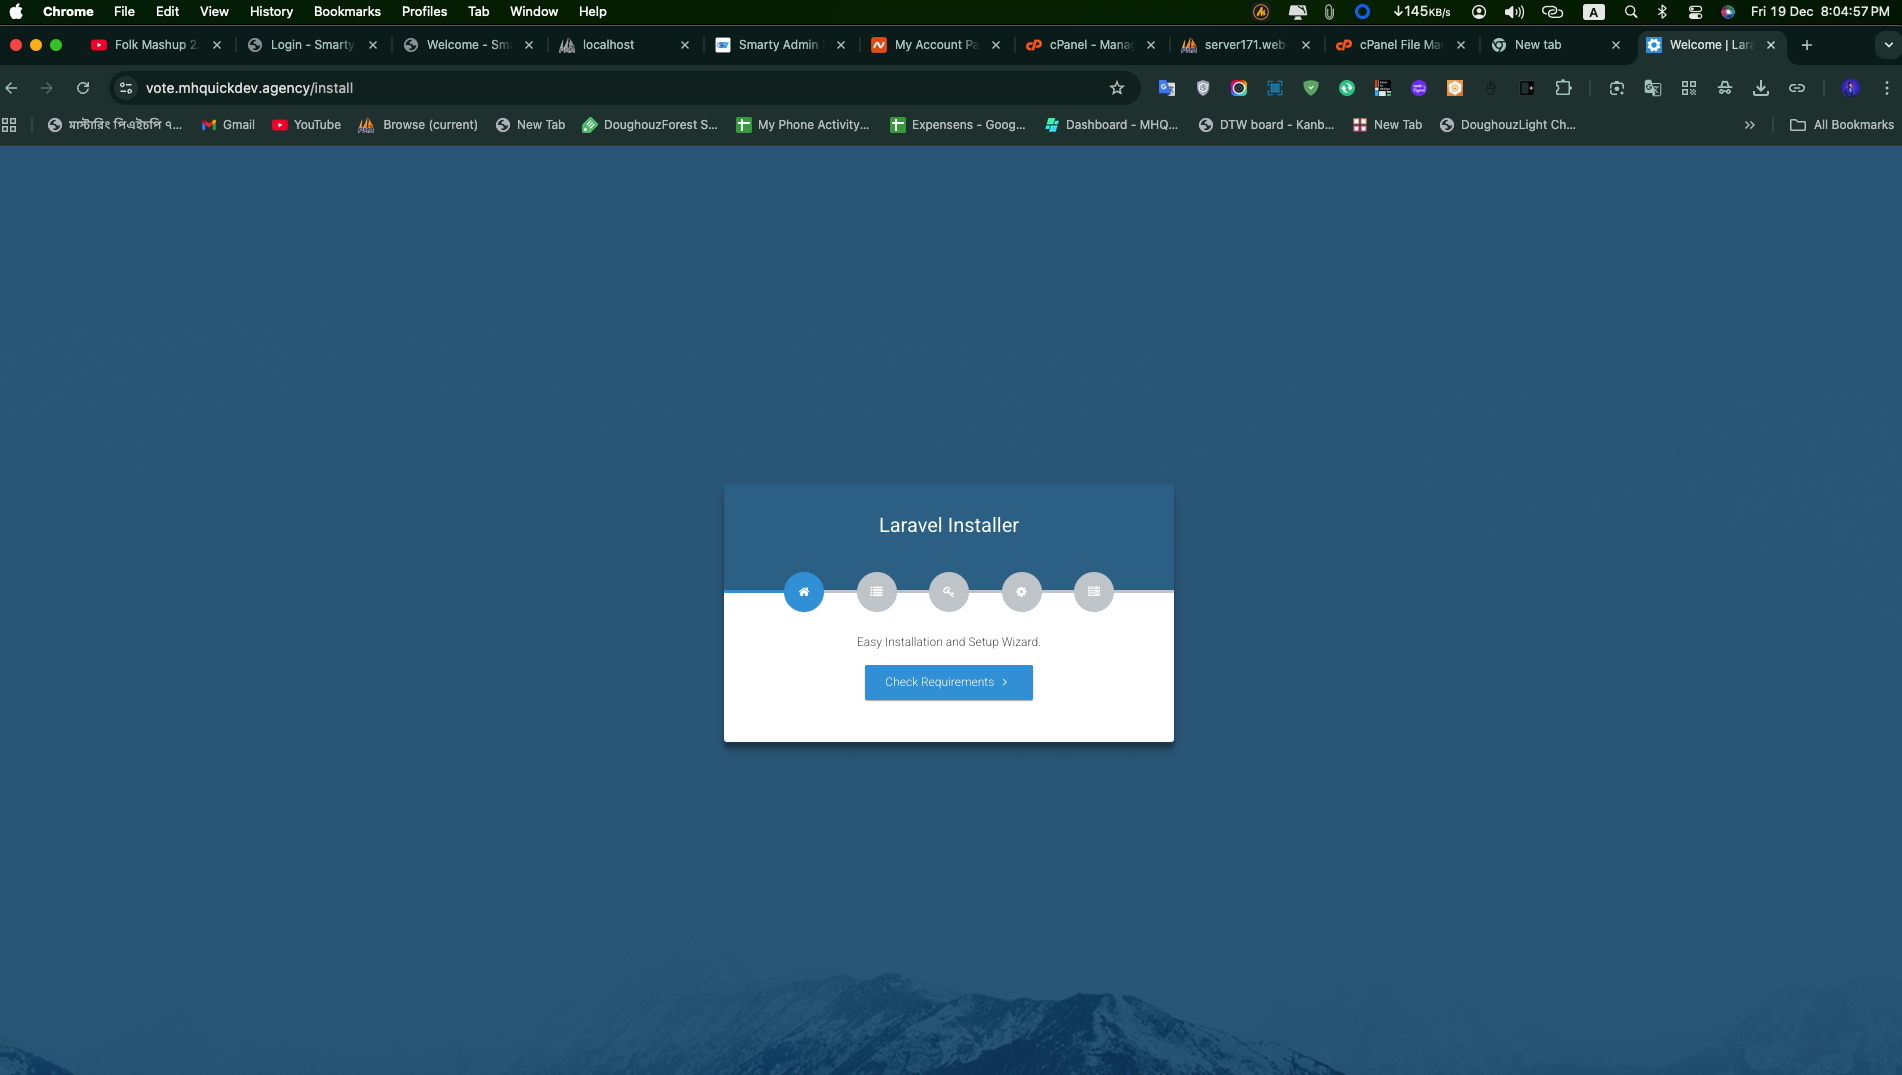
2. Requirements
Automated PHP version and extension checks. You must satisfy all prerequisites to continue. 
3. Permissions
Validates directory write access for storage and bootstrap/cache. 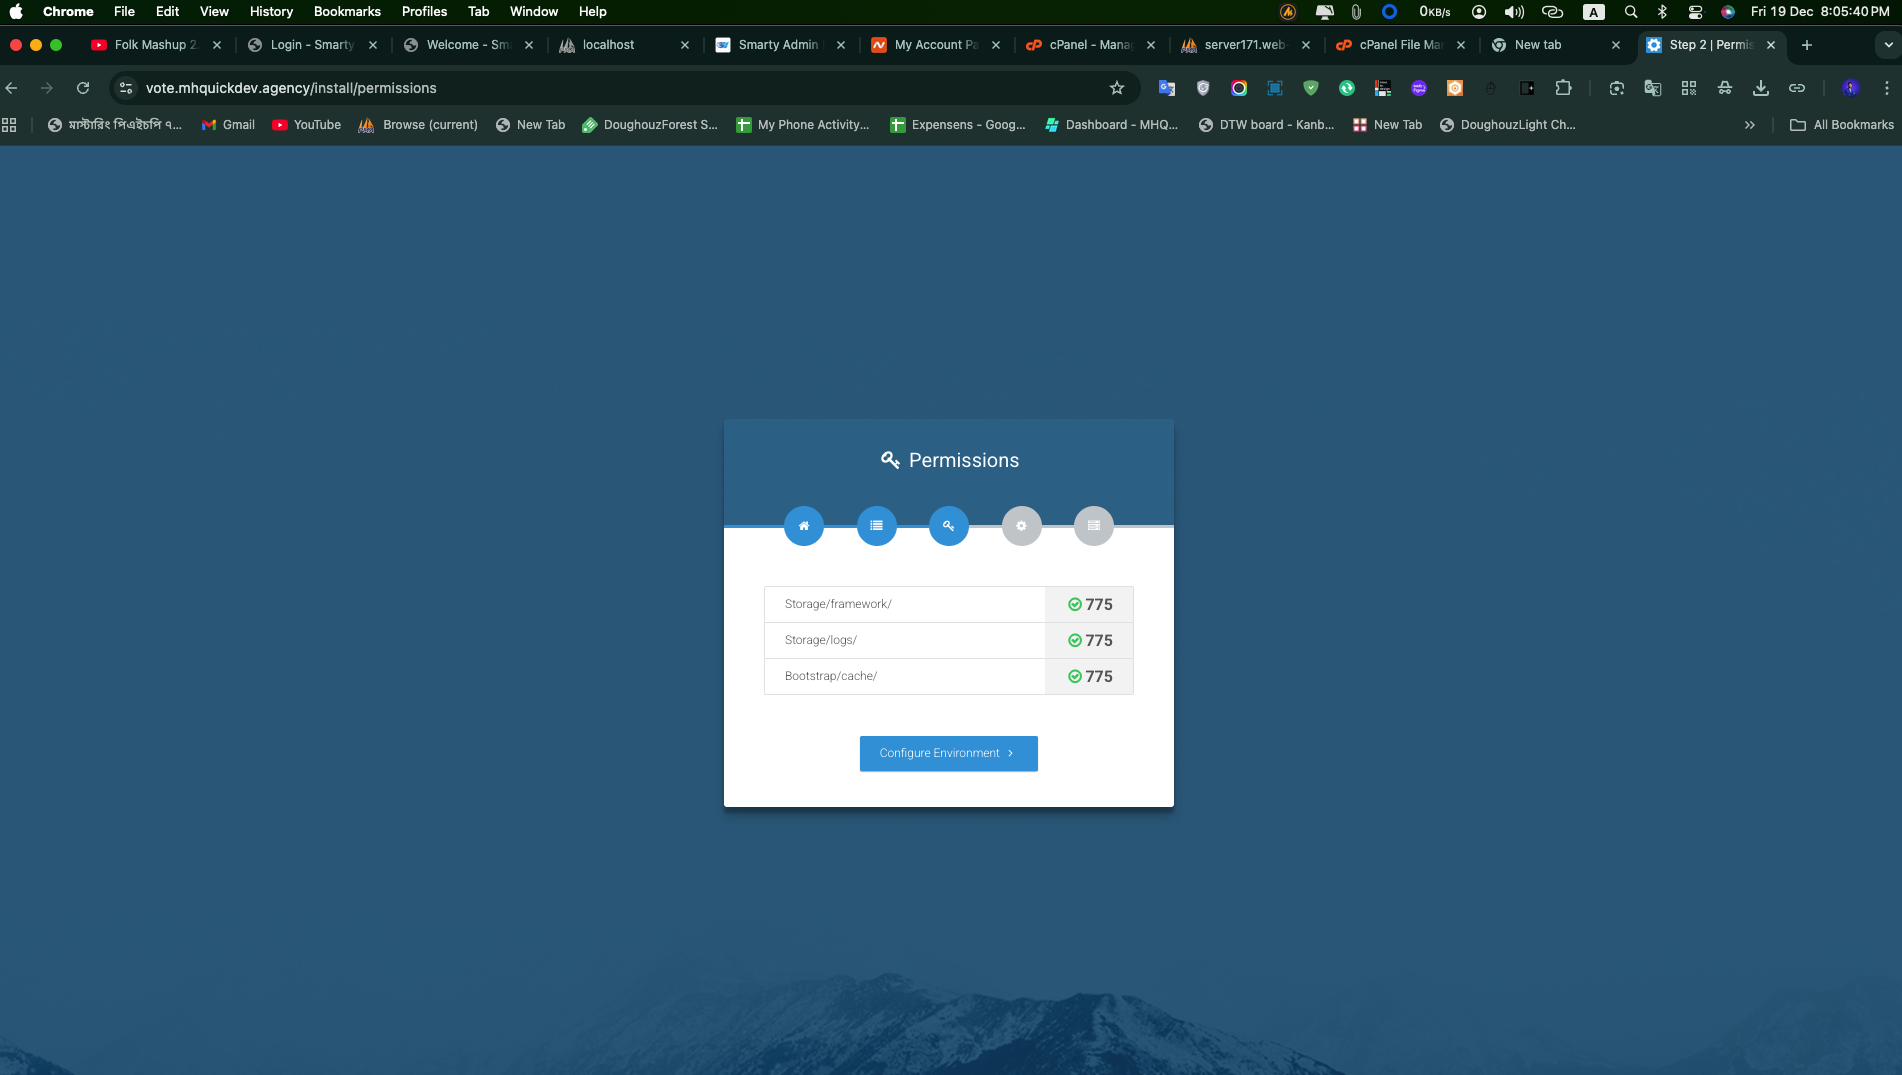
4. Environment
Guided form covering application info, database credentials, cache/session drivers, and mail setup. Values are persisted to .env. 
5. Database
Runs migrations, seeds all demo data, performs artisan maintenance commands, and logs output in real time. 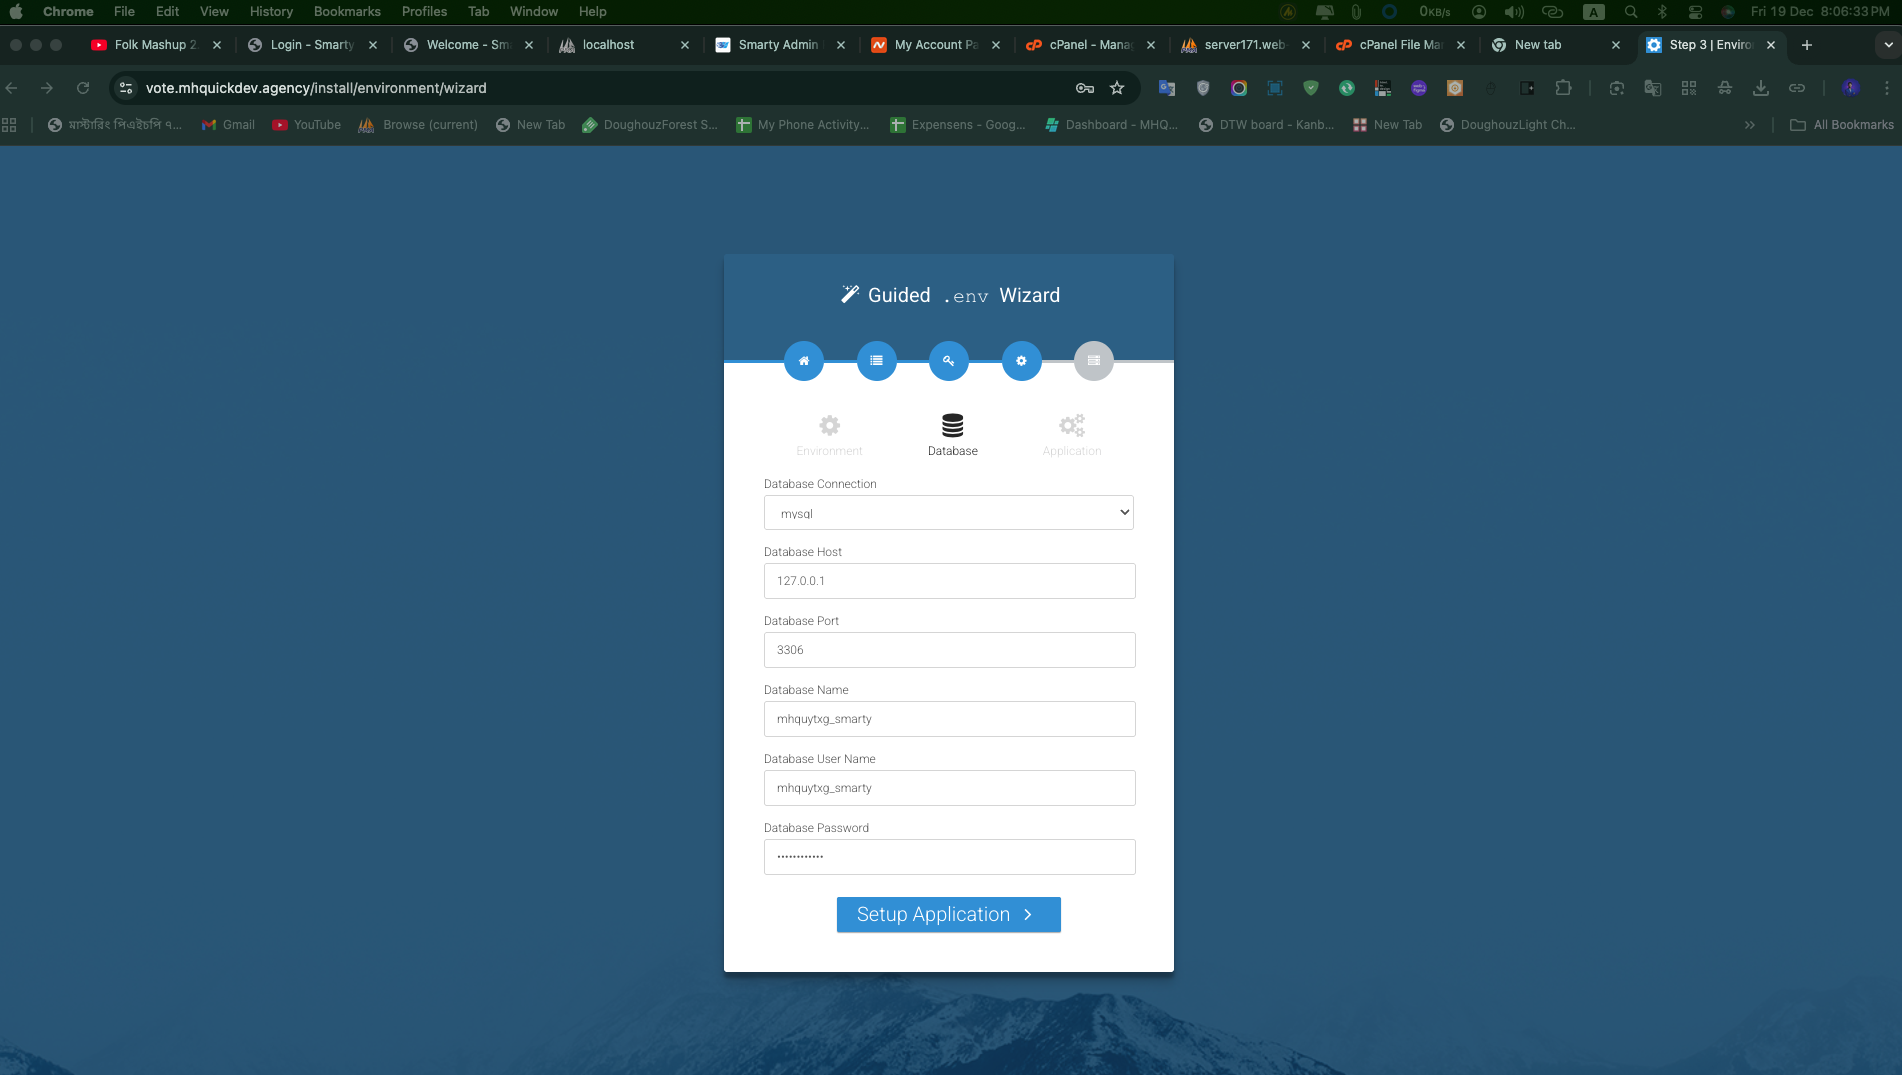
6. Finish
Displays environment summary, seeded demo accounts, and the path to the storage/installed marker. 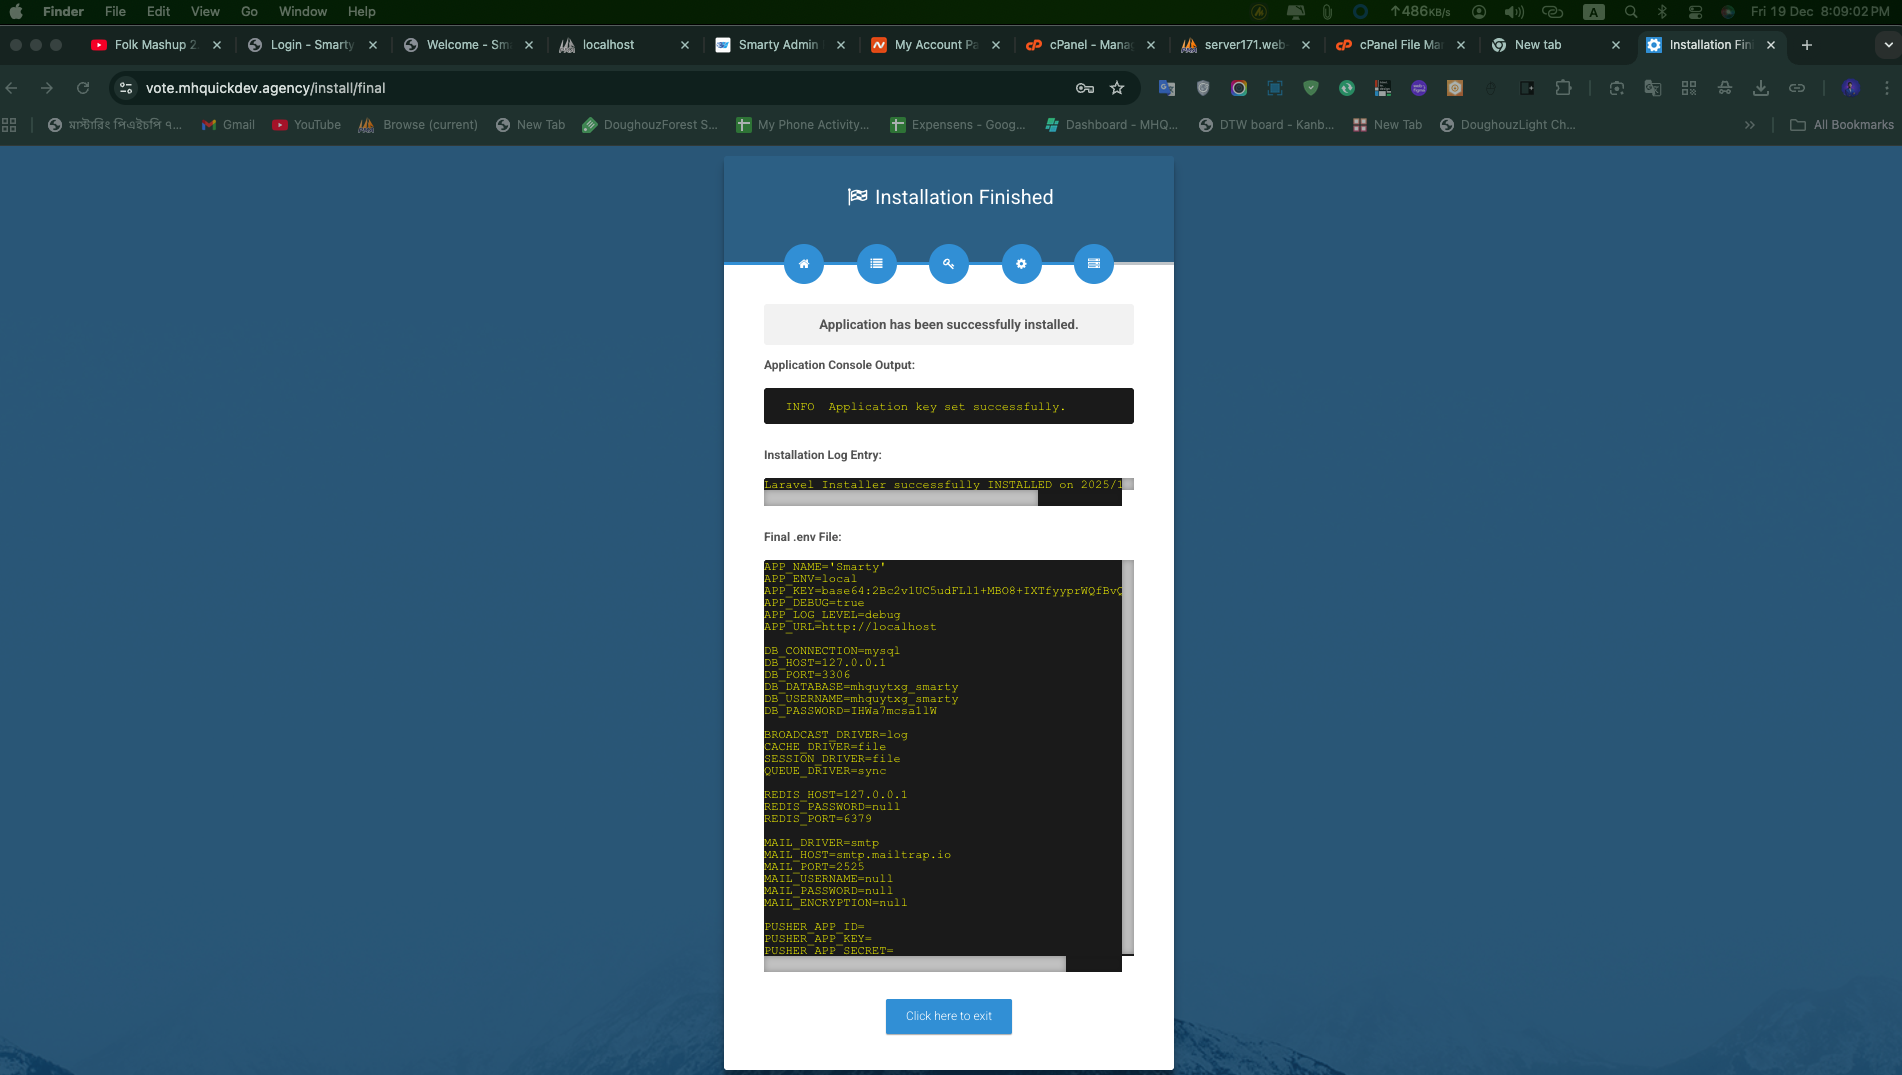
Manual installation fallback
If you cannot access the browser wizard (headless servers, CLI-only environments), follow these steps:
- Copy the environment template and update manually:bash
cp .env.example .env php artisan key:generate - Configure database credentials in
.env, ensure the database exists, then run:bashphp artisan migrate --force php artisan db:seed --force - Run final commands to clear caches and ensure the app key exists:bash
php artisan optimize:clear php artisan key:generate --force - Create the installation marker to skip the wizard:bash
php -r "file_exists('storage/installed') || touch('storage/installed');"
TIP
Delete storage/installed anytime you need to re-run the wizard.
Demo accounts
The seeders provision ready-to-use accounts for quick testing. All use the password password.
URL: www.yourdomain.com/admin
| Role | Password | |
|---|---|---|
| Administrator | admin@example.com | password |
| User | user@example.com | password |
SMTP Setup
Configure your email delivery settings in the .env file. Below are examples for common providers.
MAIL_MAILER=smtp
MAIL_HOST=smtp.mailtrap.io
MAIL_PORT=2525
MAIL_USERNAME=your_username
MAIL_PASSWORD=your_password
MAIL_ENCRYPTION=tls
MAIL_FROM_ADDRESS=noreply@yourdomain.com
MAIL_FROM_NAME="${APP_NAME}"
Features
Dashboard Overview
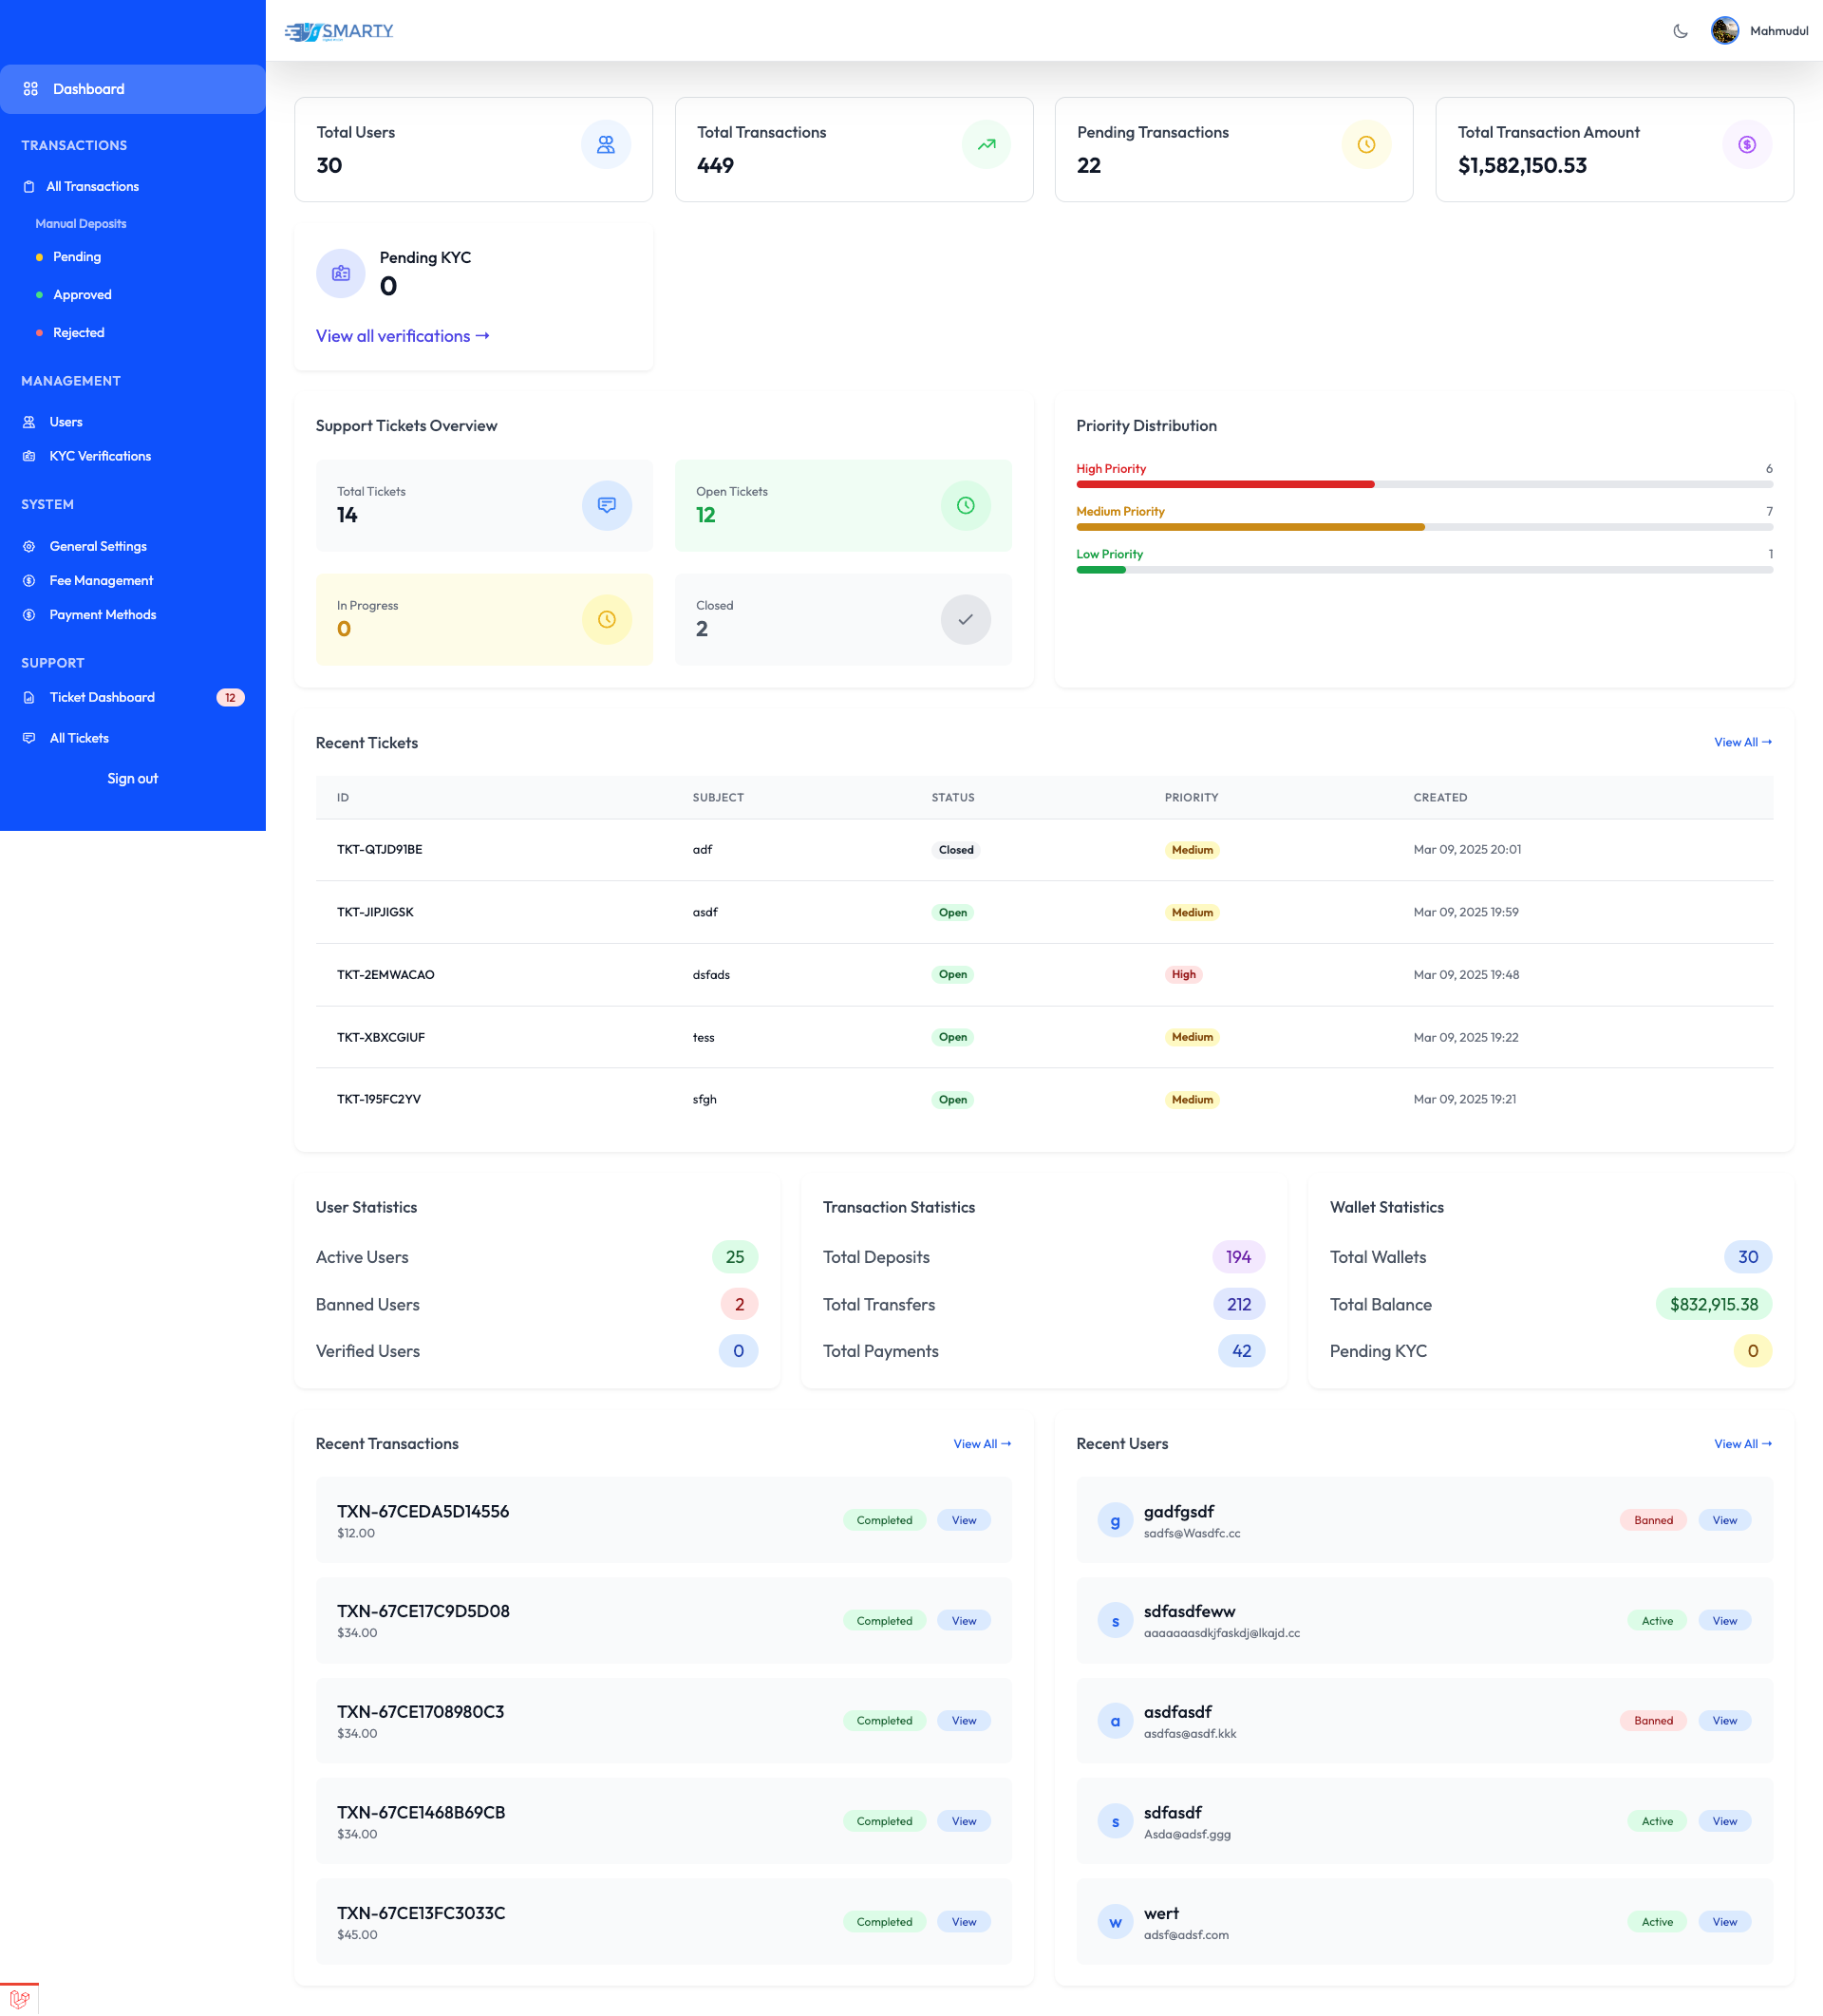
Dashboard Features:
- Transaction Statistics: Real-time overview of all financial activities.
- User Analytics: Active users, new registrations, and user growth trends.
- Revenue Metrics: Daily, monthly, and annual revenue tracking.
- Quick Actions: Direct access to common administrative tasks.
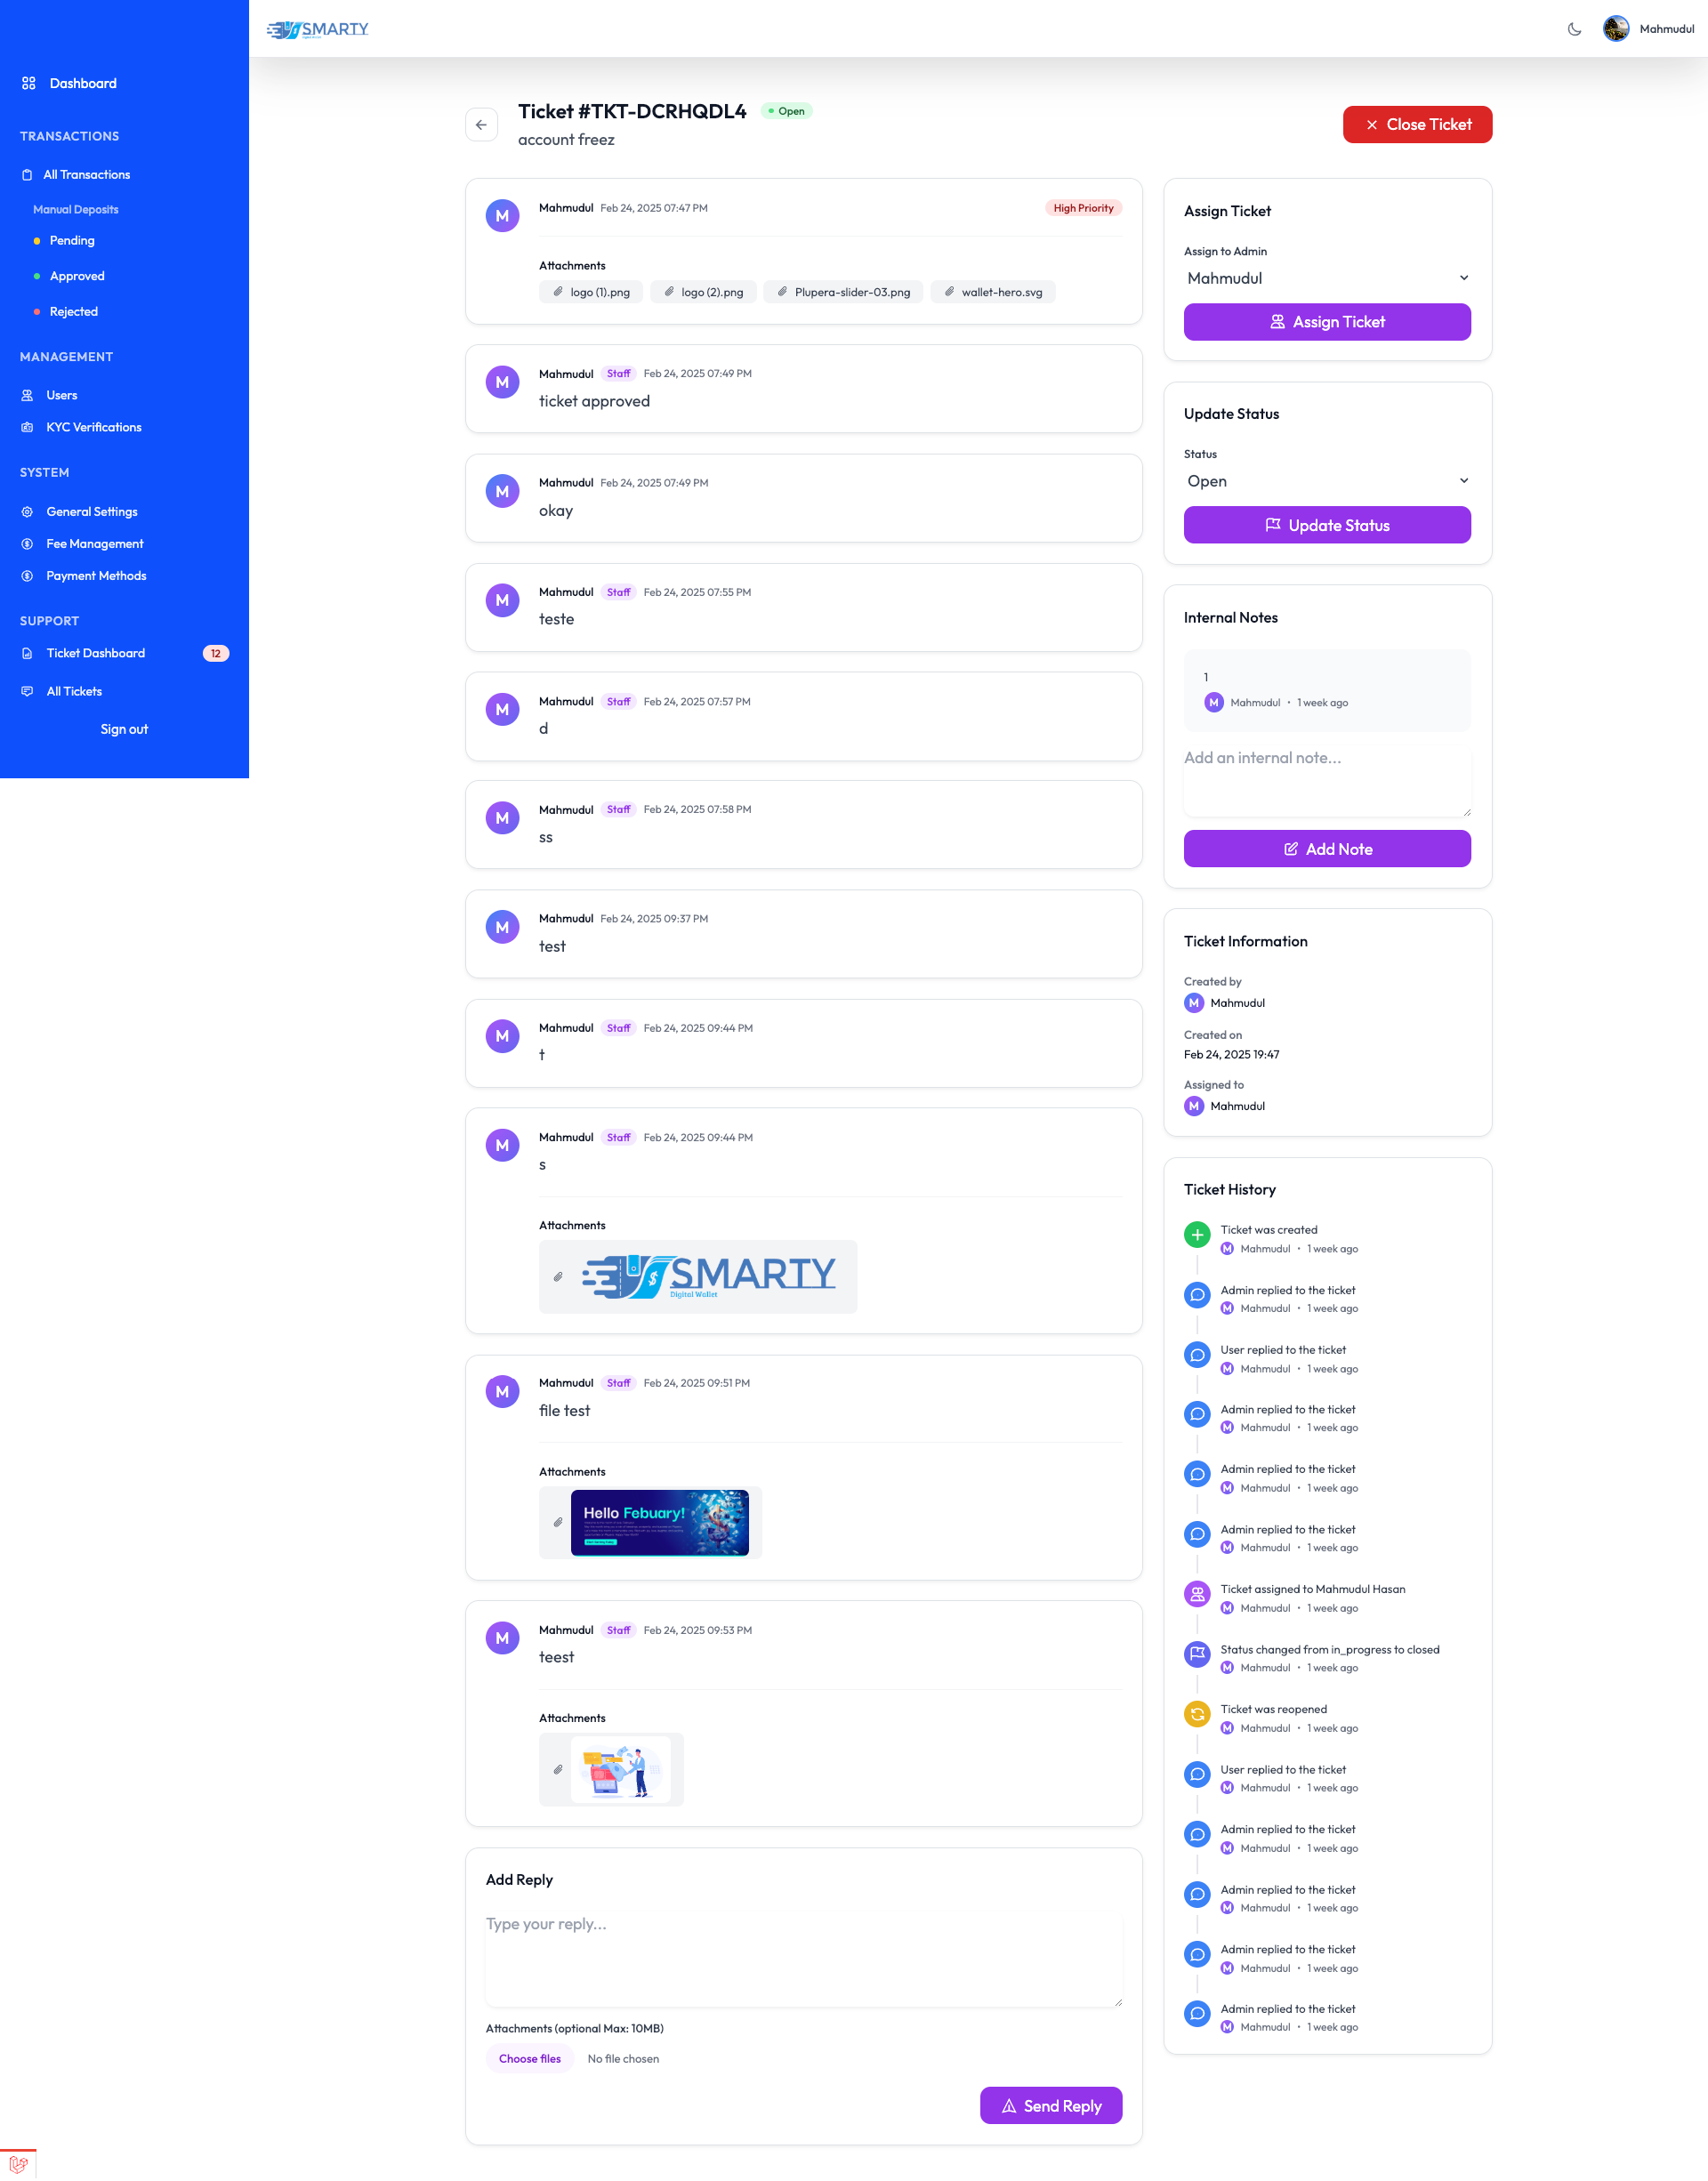
Support Ticket Management
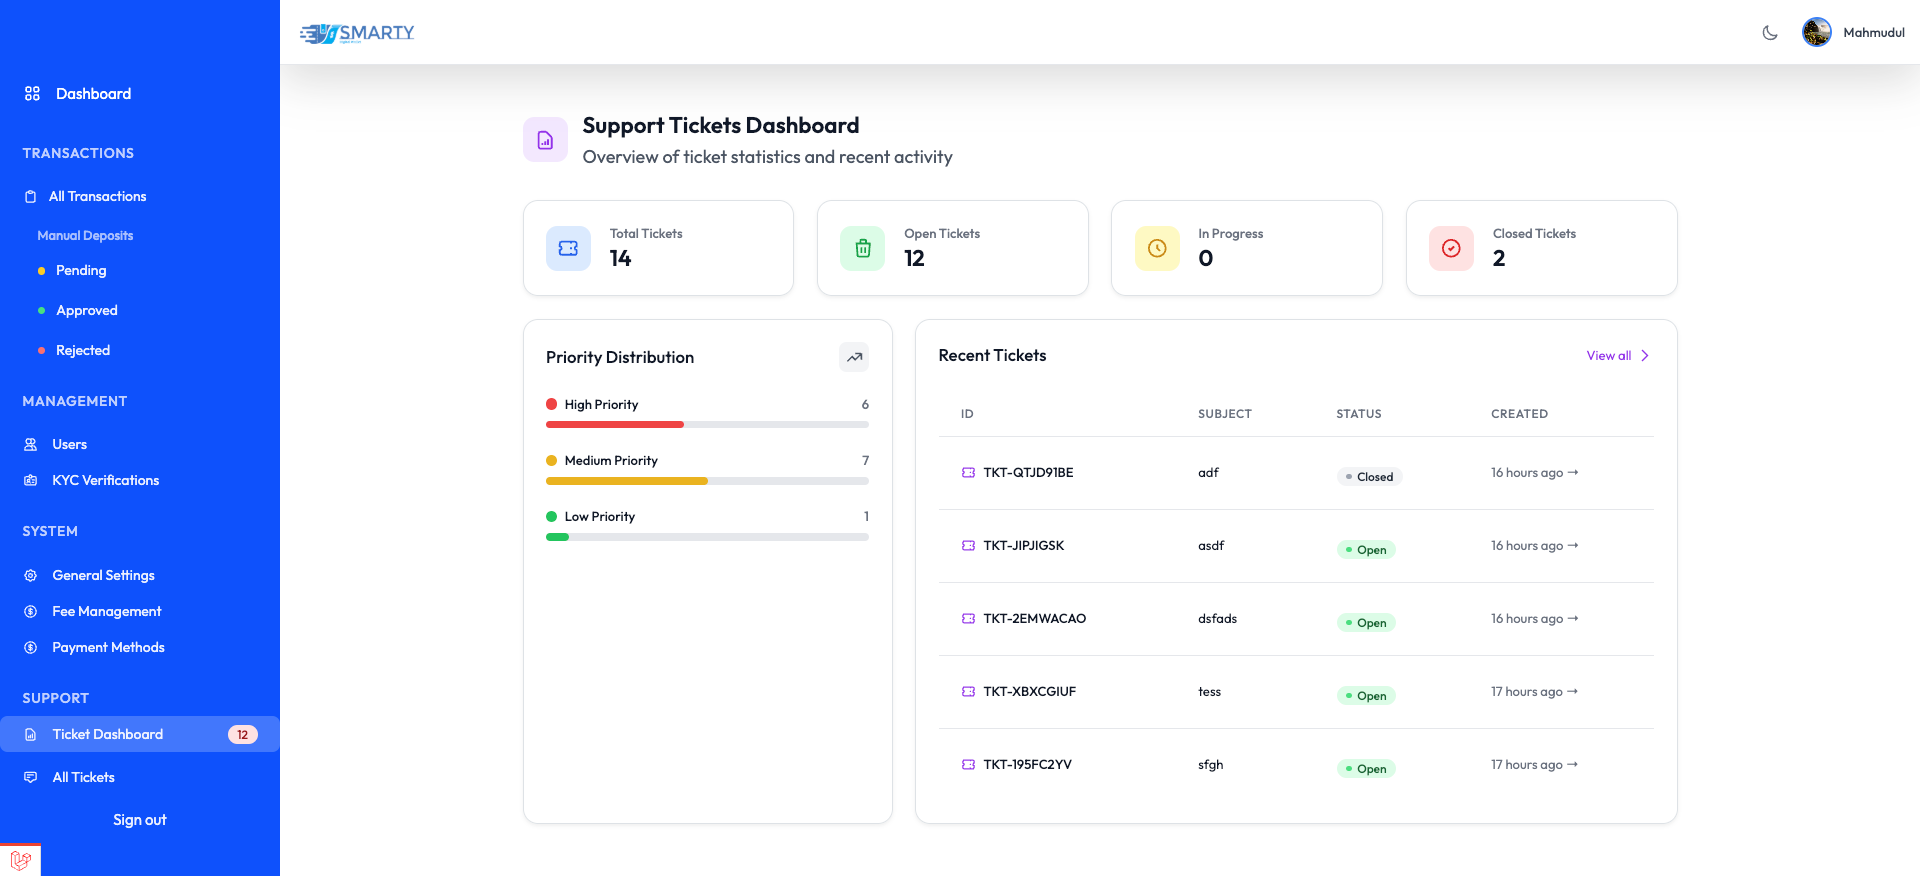
- Ticket Overview: View all support tickets at a glance.
- Priority Management: Sort and handle tickets based on urgency.
- Response Metrics: Track response times and resolution rates.
User Management
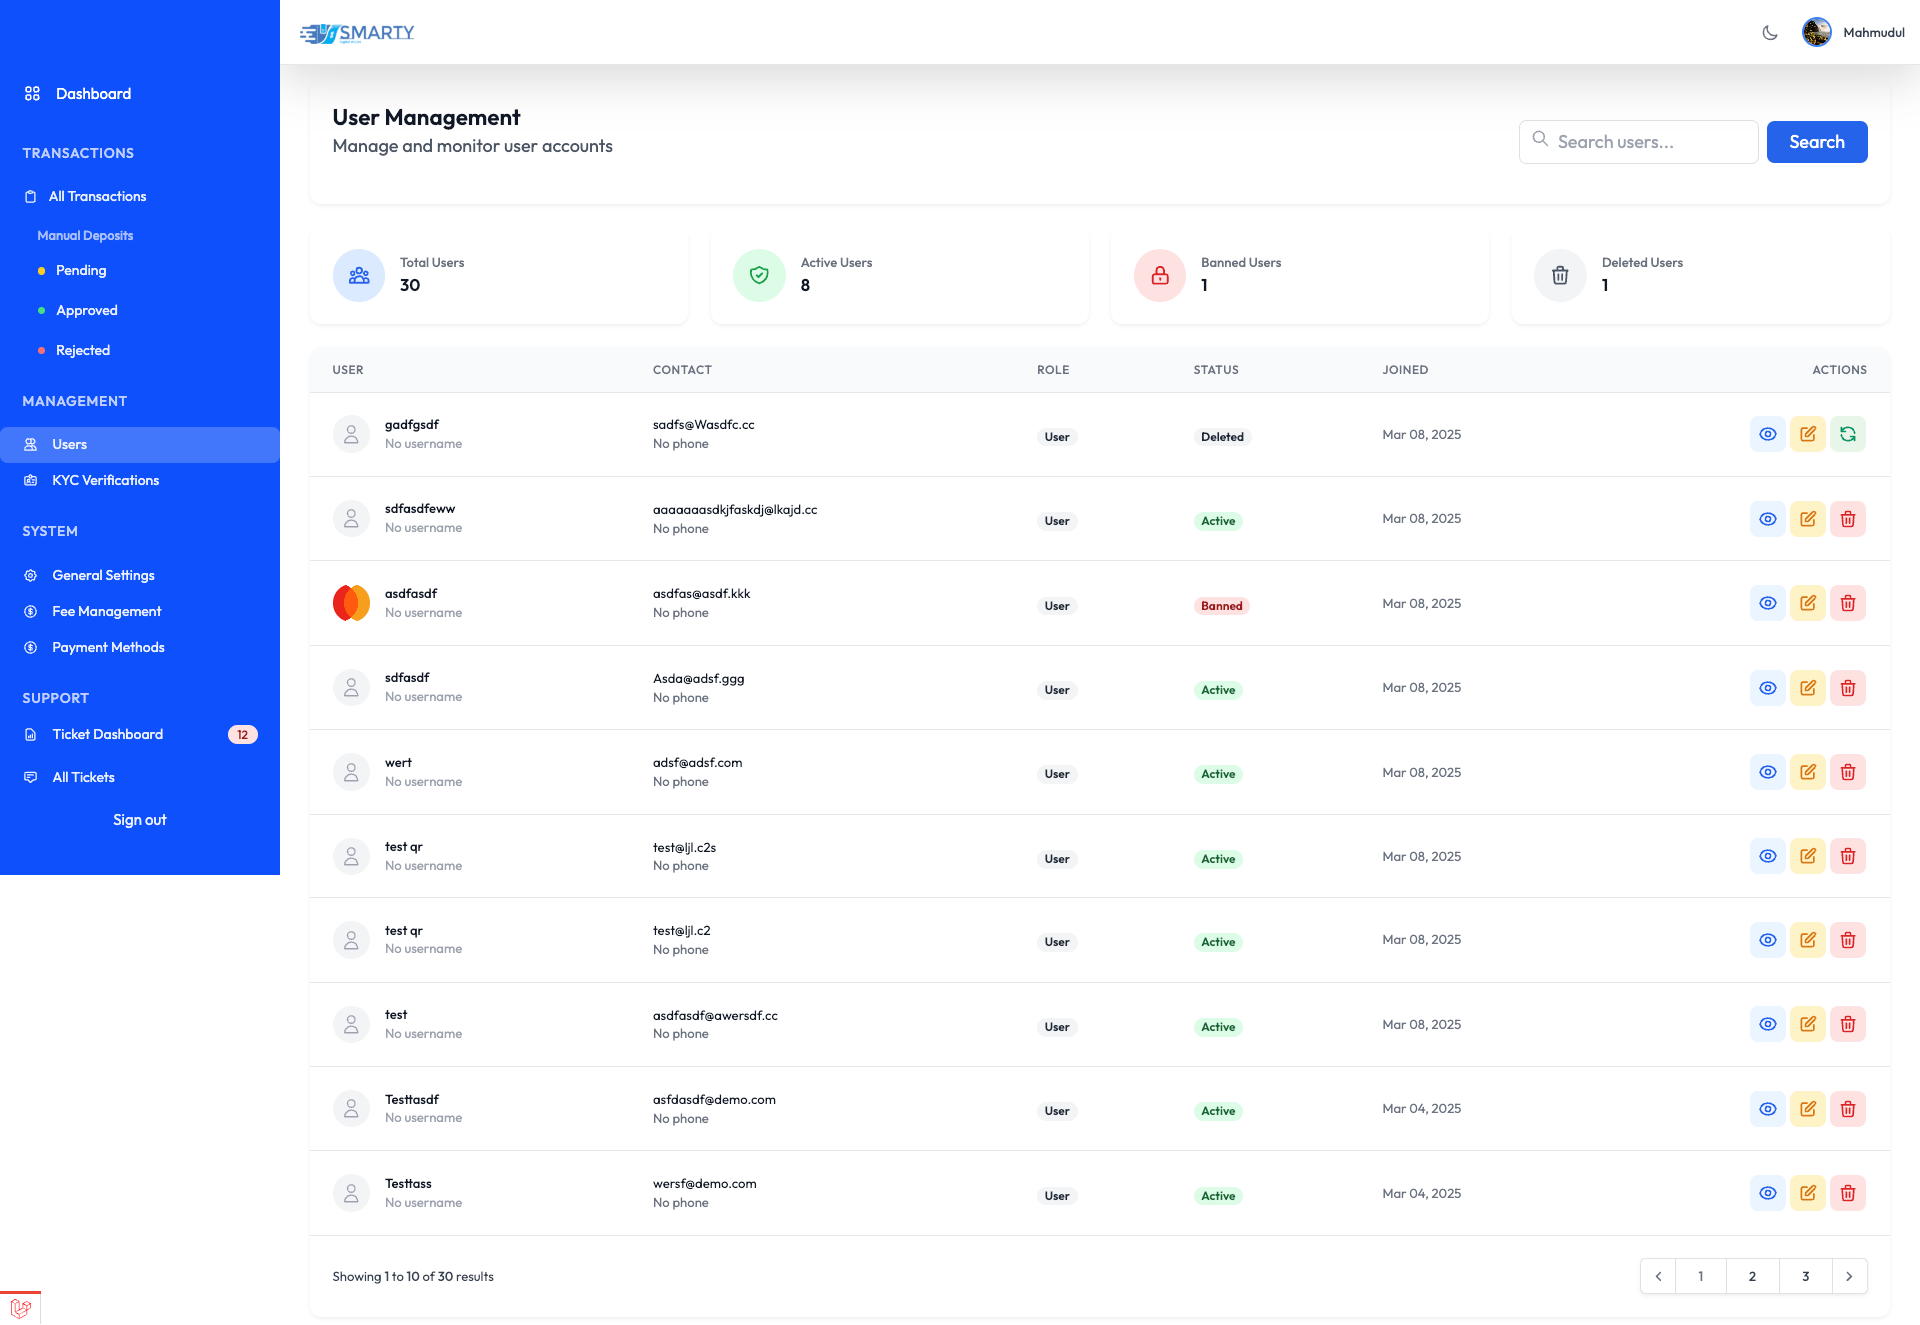
Features:
- User Profile Management: View details, edit info, update permissions, manage status.
- KYC Verification: Review documents, approve/reject verification.
- Activity Monitoring: Login history, transaction records, support tickets.
Transaction Management
Features:
- Transaction Overview: Monitor all financial transactions in real-time.
- Status Management: Review, approve, or reject pending transactions.
- Transaction Details: View complete transaction info.
- Export Options: Download transaction reports.
System Settings
General Settings

Payment Gateway Configuration

Gemini AI Configuration
Enable the intelligent AI Assistant for your users.
- Go to
System Settings > Gemini AI Configuration. - API Key: Enter your Google Gemini API Key.
- Model: Choose a model (e.g.,
gemini-1.5-flash). - Status: Toggle to Enable/Disable the chat feature globally.
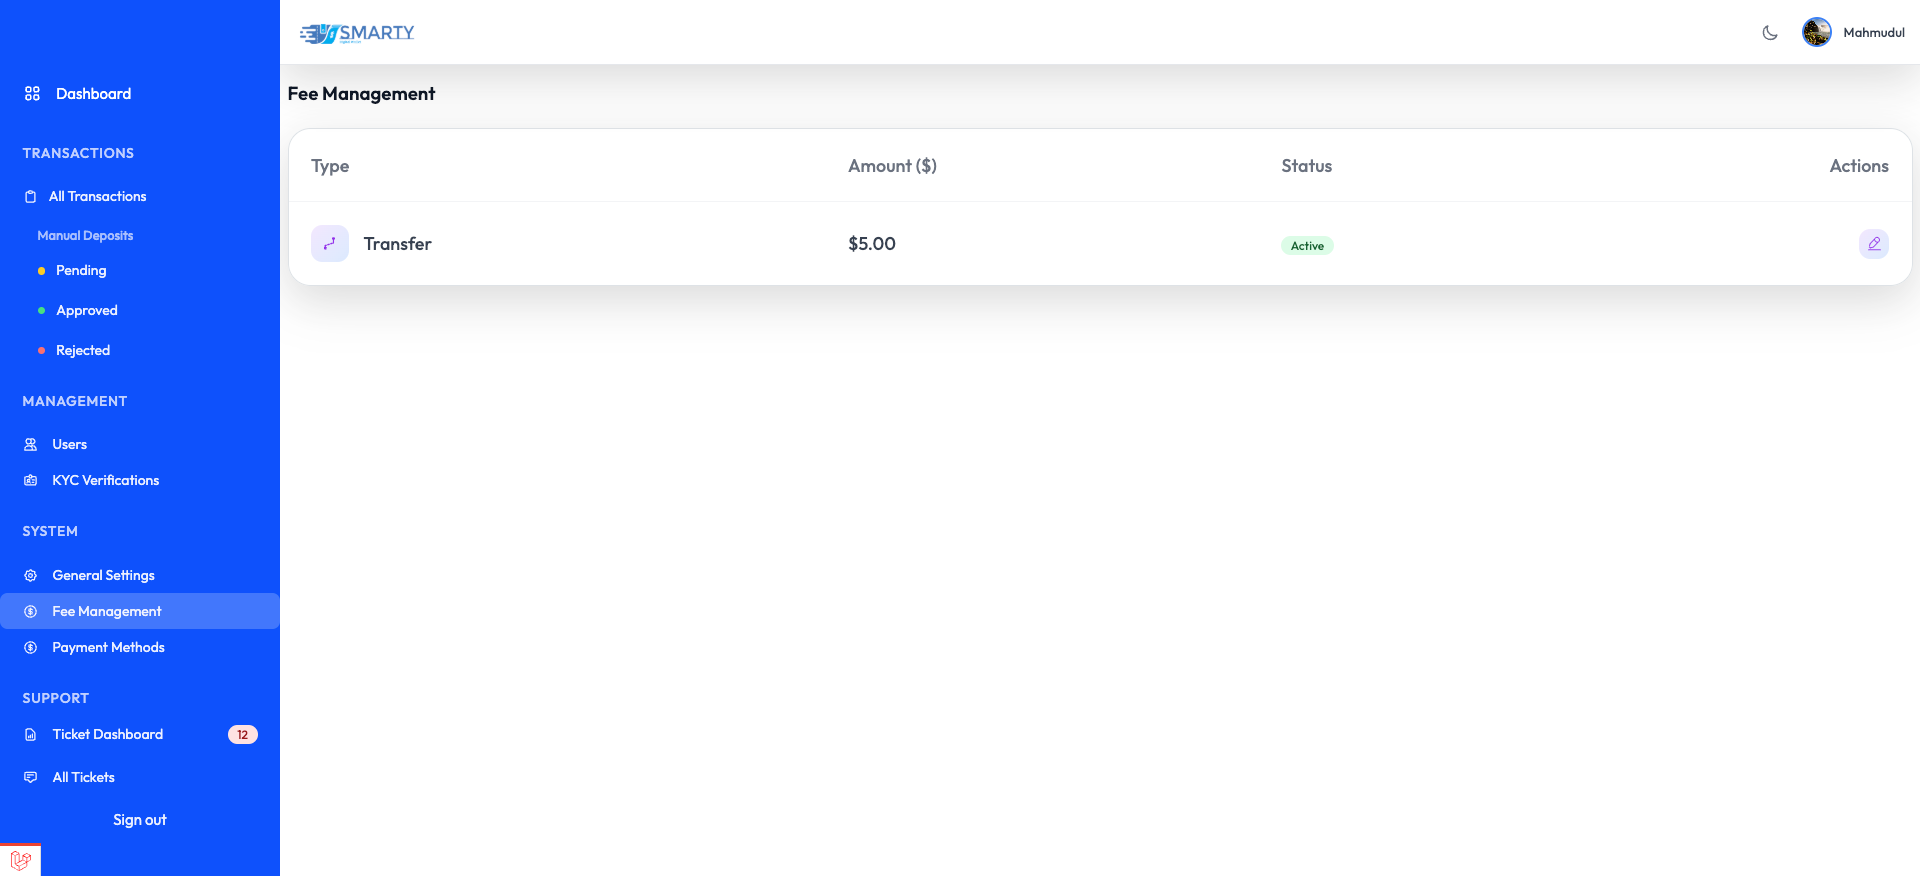
Fee Management
Support Tickets
All Support Tickets

Ticket Response Interface
Support
Technical Support
For technical assistance and troubleshooting, contact our support team:
- Email: mahmudul00770@gmail.com
INFO
Response Time: Within 24-48 hours.
Before Contacting
- Check configuration
- Verify database connection
- Check error logs
- Review documentation